Sunday, March 1, 2015

Peanut Clusters

Despite the fact that this recipe is incredibly simple to make and can be easily found elsewhere on the web, as it is one of my guilty pleasures, it only seems right to give it a home here as well.  There’s a reason chocolate and peanuts have long been paired.  The salty, sweet and nutty flavors unite in a uniquely sinful way.
 

Ingredients:
§     2 cups semisweet or bittersweet chocolate (or a combination of both)
§     2 cups salted peanuts (divided)


Directions:

Line a cookie sheet with parchment paper. 


Your peanut clusters will only taste as good as the chocolate you begin with, so make sure you use a good chocolate like Ghirardelli or Lindt.  If using block chocolate, with a sharp knife, chop the chocolate as finely as possible to help melt the chocolate quickly and evenly. There is no need to break down the chocolate if you are using chips or wafers.  Place 1 1/2 cups of the chopped chocolate into a medium glass bowl. Glass retains heat, so the chocolate will stay melted longer.


Microwave on high for 30 seconds.  Remove and stir.  If chocolate is not thoroughly melted, microwave for another 10 seconds.  Repeat if necessary but do not overheat the chocolate.  Remove from the microwave and add the remaining 1/2 cup of room temperature chocolate to the mixture.  The residual heat will melt the chocolate as it tempers the mixture. 


Add 1 1/2 cups of the peanuts and mix.  Slowly add the remaining nuts making sure there is enough chocolate to coat all of the peanuts. 


Using two teaspoons or a small candy scooper, drop equally sized mounds of chocolate coated peanuts onto the parchment paper. 


Let cool at room temperature for approximately 1 hour until firm.  Store peanut clusters in an airtight container until ready to serve. 


For a printer friendly copy of this recipe, go to Peanut Clusters. Enjoy!

Sunday, February 1, 2015

Shaved Ham Rolls

With Valentine’s Day just two weeks away I should be sharing recipes like my previously posted “Sweet and Spicy Chocolate Truffles,” “Chocolate Salami” and “White Chocolate Bark,” but this week I’ve got Superbowl Sunday on the brain. 


I could repeat the recipe that began this blog, “Bacon Candy,” which continues to be my most requested recipe, or several dishes that would be welcome at any Superbowl party: ”Sweet Onion Dip,” ”Smoked Salmon Mousse” or one of my personal favorites, ”Hot Corn Dip.” But, today I want to share a recipe that was passed down to me by the late Mrs. Frances Oliver.  Her birthday was last week and I am pleased to honor her with this vintage dish, “Shaved Ham Rolls” which for decades she proudly carried to many a southern potluck.

Ingredients:
§     1/2 pound (2 sticks) room temperature butter or margarine
§     3 tablespoons prepared mustard
§     3 tablespoons poppy seeds
§     1 medium onion, finely chopped
§     1 teaspoon Worcestershire sauce
§     3 packages Pepperidge Farm Party rolls (rolls sit in aluminum pan and come 30 to a package or 2 packages of King's Hawaiian Rolls
§     1 pound shredded ham
§     1/2 pound Swiss cheese, thinly sliced

Directions:
Preheat oven to 400 degrees. 
Mix together softened butter, mustard, poppy seeds, chopped onion and Worcestershire sauce in small bowl.
  
Carefully cut the rolls in half horizontally and return the bottom half to the baking pan. Spread a thin layer of the mixture onto the top and bottom of the rolls.  Place a thin layer of the ham and cheese, replace top layer of rolls and place back into the baking pan. 
Repeat for remaining packages of rolls.  Cover the pans tightly with aluminum foil, and refrigerate until ready to eat. 
This recipe can be prepared in advance, wrapped and placed into the refrigerator for several days.  When ready to serve, place the wrapped baking dishes in a preheated oven for 10-15 minutes or until cheese is melted and sandwiches are warm.  If using the larger King’s Hawaiian Rolls, increase warming time to 15-20 minutes.
Cut into pieces and serve immediately.  For a printer friendly copy of this recipe, go to Shaved Ham Rolls. Enjoy! 

Sunday, January 4, 2015

Potato Latkes

Latkes are potato pancakes that are perhaps the best know traditional Hanukkah food.  These crispy treats symbolize the miracle of Hanukkah because they are fried in oil.  Like most great traditional foods, every Jewish family has their favorite latke recipe that is passed from generation to generation.  The underlying formula is the same in that nearly all latke recipes have some combination of grated potatoes, onion, egg and flour or matzo meal.  After combining the ingredients, small portions are fried in vegetable oil for a few minutes.  
I got my passion for cooking from my mother. Perhaps that’s why I always find inspiration, inner peace and tranquility when I’m in my kitchen. Preparing my mother’s traditional potato pancakes can be a time consuming process, which is why we only made them at Hanukkah. She began by peeling and finely grating (not shredding) 20 pounds of potatoes on a box hand grater.  By substituting refrigerated shredded hash brown potatoes, my version is a snap to prepare.  This is a traditional comfort food that can be eaten with applesauce and/or sour cream for a light dinner or with roast chicken for a hearty winter meal.  These crispy potato latkes are so delicious and addictive; you won’t have to wait for a holiday to enjoy them.
 

Ingredients:
§     1 1/2 pounds peeled, shredded potatoes or 1 bag of refrigerated shredded hash brown potatoes
§     1 medium yellow onion, grated or diced
§     2 eggs, lightly beaten
§     3 tablespoons of flour or matzo meal
§     1 1/2 teaspoons kosher salt
§     Freshly ground black pepper (optional)
§     Vegetable oil for frying
§     Sour cream and/or applesauce for serving

Directions:
If you are using fresh potatoes, peel the potatoes and finely grate or shred them on a box grater into a bowl.  To remove the liquid, I wrap the grated potatoes in 2 or 3 paper towels and squeeze out the liquid over the sink.  Return the potatoes to the bowl. 

If you are using store bought refrigerated, shredded hash brown potatoes, empty the bag into a bowl and add the onion, eggs, flour salt and pepper.  Mix well. 


Heat 1/4 inch oil a heavy skillet over medium high heat.  Drop 1/4 cup mounds into the hot oil and flatten to make 1/2 inch thick pancakes.
 
Fry, turning once, until crisp on the outside and golden brown. 


Repeat until all potato mixture is used.  Serve the latkes hot from the skillet with sour cream and/or applesauce. 


For a printer friendly copy of this recipe, go to Potato Latkes. Enjoy! 

Note:  If you are not eating latkes immediately, keep warm in the oven until ready to serve.

Sunday, December 7, 2014

Chicken Noodle Casserole

I have not baked a chicken in the oven since rotisserie chicken became available from the big box store in my neighborhood.  These moist, plump and flavorful chickens are undeniably better than the ones I made, so I began focusing on sides to accompany this main course.

But when my friend, Michael, introduced me to the vacuum packed bags filled with white meat freshly pulled from the rotisserie chickens and found in the refrigerator display, it changed my world.  I now always have fresh chicken pulled from the bone on hand which has encouraged me to develop interesting, new recipes.


This recipe for Chicken Noodle Casserole is by no means new, but for years it has been one of my heartwarming, comfort foods, so I thought I would share it with you.
Ingredients:
§     2 cans of Cream of Mushroom Soup or homemade Cream of Mushroom Soup (see recipe below)
§     1 1/2 cups milk
§     1/2 cup sour cream (optional)
§     2 cups frozen mixed vegetables …carrots, green beans, corn and peas (I prefer to add peas and corn only)
§     1/2 cups grated Parmesan cheese
§     2 cups of cooked chicken, shredded
§     12 ounces of medium egg noodles, cooked and drained
§     2 sprigs of fresh thyme (optional)
§     1/2 teaspoon kosher salt
§     1/4 teaspoon ground black pepper
§     1 cup shredded Cheddar cheese, divided
§     1/2 stick of room temperature butter or cooking spray to prepare casserole dish.

Directions:

Preheat the oven to 375 degrees.  Bring a medium pot of generously salted water to a boil.  Add the egg noodles and cook until al dente, about 4 minutes and drain.  Prepare casserole dish by buttering with room temperature butter or spray with non-stick cooking spray. 
In a large bowl mix together the soup, milk, sour cream, frozen vegetables, Parmesan cheese, thyme, salt, pepper and 1/2 cup of the shredded Cheddar cheese.
 
Add the cooked chicken and noodles and fold together.
 
Transfer to the prepared casserole dish.  To freeze the casserole for a later time, wrap tightly in plastic wrap and place into the freezer.  To bake, place the casserole dish in a preheated oven until bubbly and lightly brown on top.
 
Before removing from the oven, remove the plastic wrap and sprinkle the remaining 1/2 cup of shredded Cheddar cheese.  Return to oven for 1 – 2 minutes until the cheese melts.
Remove from oven and serve warm.  For a printer friendly copy of this recipe, go to Chicken Noodle Casserole. Enjoy!

Note:  I like my casserole to be creamy, so I bake it wrapped in plastic wrap.  Yes….I bake my casserole while it is tightly wrapped in plastic wrap.  Plastic wrap will not melt unless your oven is over 500 degrees or you have the broiler element turned on. If you prefer a dry, crispy casserole, bake openly or covered with foil.

Homemade Condensed Cream of Mushroom Soup:

To make homemade Cream of Mushroom Soup first prepare the mushrooms.  Melt 3 tablespoons of unsalted butter in a small Dutch oven.  Add 1/2 pound sliced mushrooms and cook, stirring occasionally, until tender and browned, about 4 – 5 minutes.  After the mushrooms are cooked, add salt and pepper to taste.  (Do not salt the mushrooms while they are cooking as the salt will draw out the water from the mushrooms and they will not brown) Remove from pan and set aside.  To make a roux, melt 3 tablespoons of butter in a small pan. When butter is melted, add 3 tablespoons of flour and whisk together over medium-low heat for a minute or two just to get the raw taste out of the flour.  While whisking, add 1 cup of chicken broth and 1 cup of milk and continue to cook until thick and smooth. To speed up the process, I sometimes pour the broth and milk into a heat resistant cup and warm in the microwave before adding it to the roux.  Once the white sauce is thick and smooth, lower the heat and add the mushrooms.
.
 

Sunday, October 5, 2014

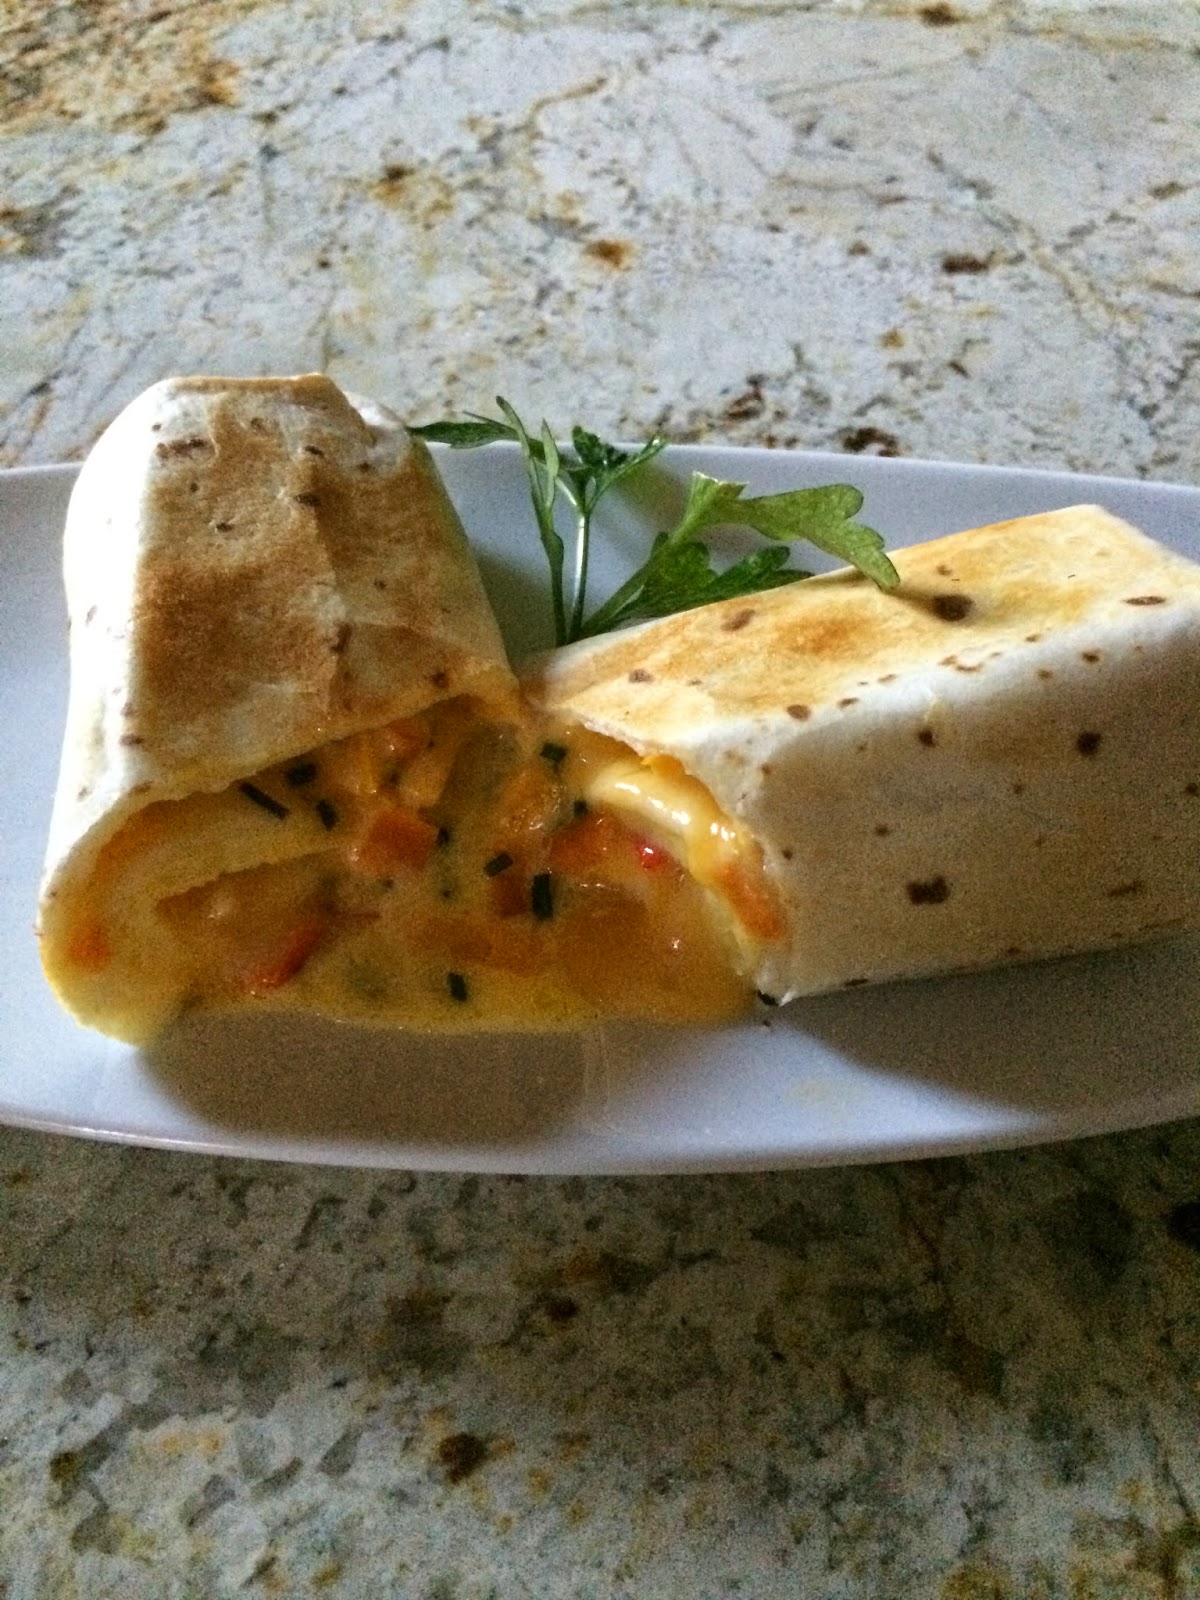
Breakfast Burritos

I am often asked why my breakfast recipes, such as Vegetable Frittata and Breakfast Baskets are vegetarian.  Don't get me wrong.  I love bacon.  Actually, if it wasn’t for my Candy Bacon recipe, I probably would have never started writing this blog.  I couldn’t go anywhere without people asking me for that recipe.  Although I love bacon, when I add it to some dishes or sandwiches, like these Breakfast Burritos, I don’t taste anything but the bacon, so I choose to eat my bacon on the side.  

I started making Breakfast Burritos when summer was over and I needed some quick and easy, go-to-breakfasts while rushing to get out in the morning.  I typically make 8 of them at a time because that’s how many tortilla wraps are in the package.  To freeze, wrap them individually in plastic wrap and place most of them in the freezer.  Be sure to have one or two in the refrigerator, where they can stay fresh for several days.  I fill them with what I like to eat, but feel free to add cooked breakfast meats and/or other vegetables that you prefer.


Ingredients:
§     1 package flour tortillas (8)
§     8 eggs
§     1/4 cup milk or half and half
§     2 teaspoons kosher salt, divided
§     4 tablespoons butter
§     2 - 3 cups grated cheese
§     2 - 3 cups chopped vegetables

Optional:
§     Cooked Breakfast meat (sausage or bacon), optional

Directions:
In a medium sized bowl, add eggs, milk and half of the salt and beat well.
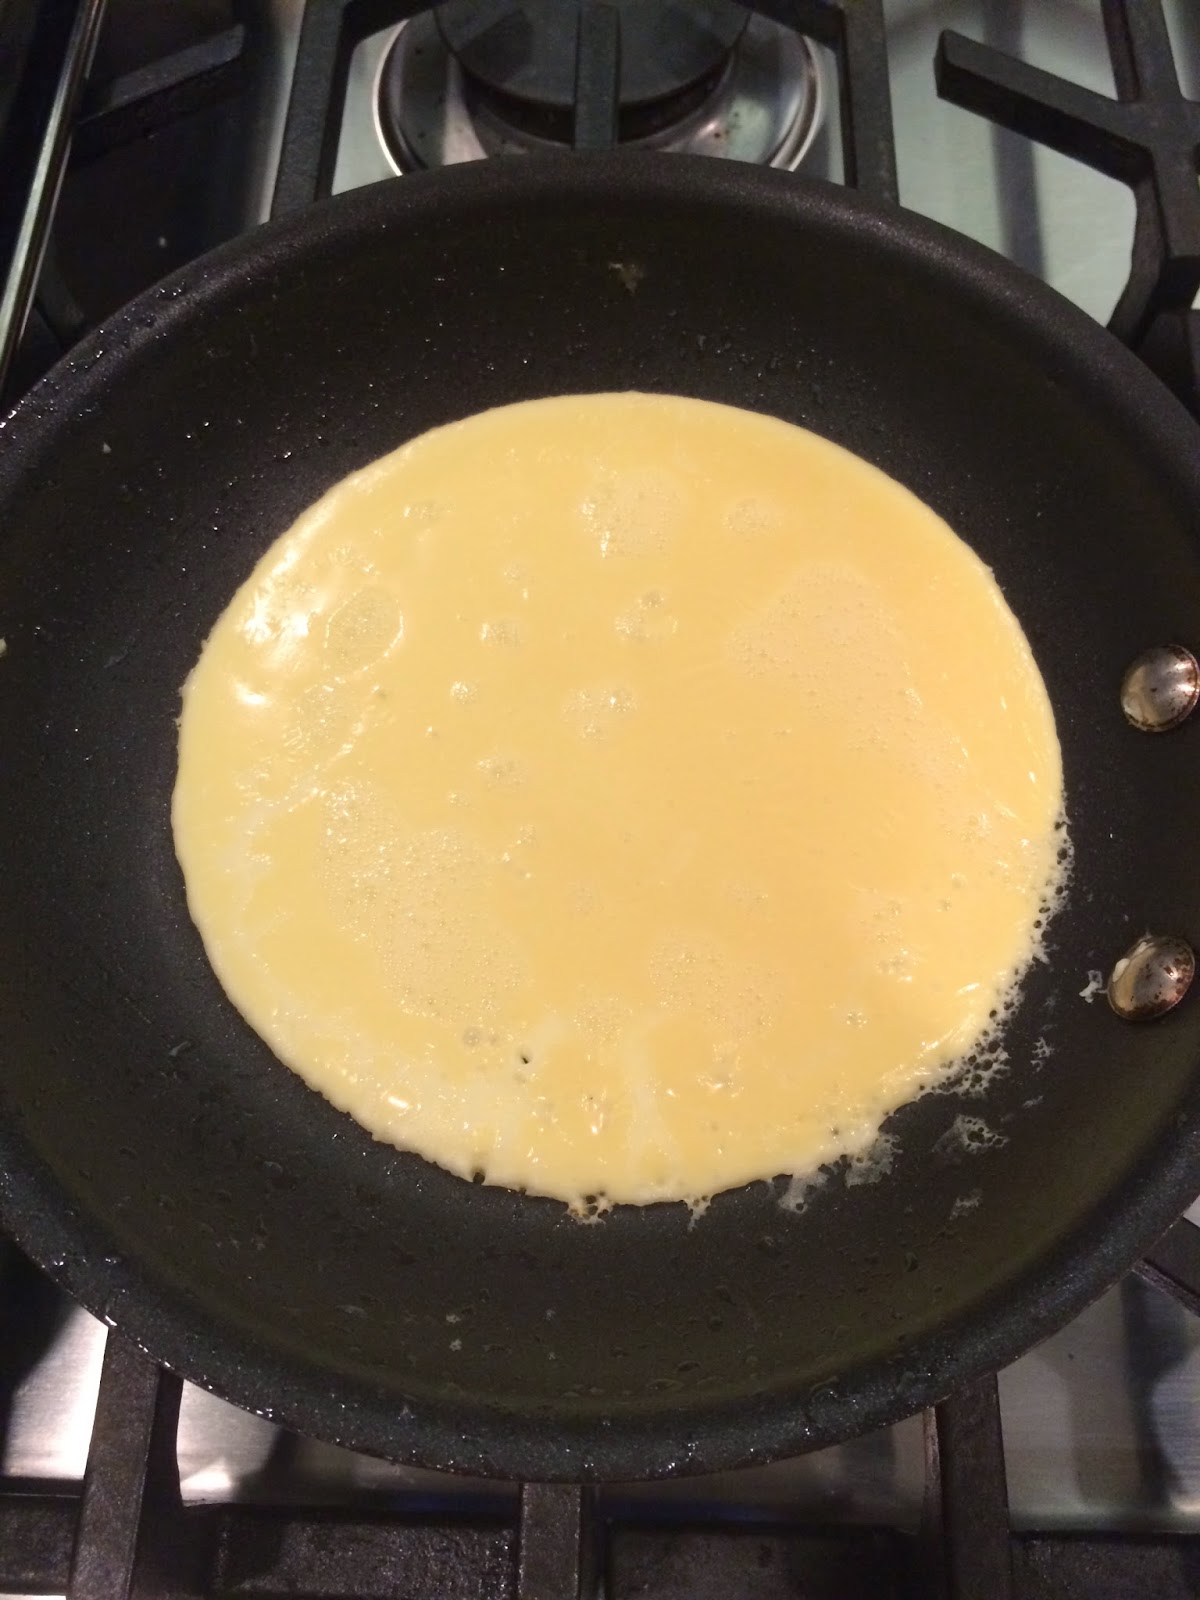
Over medium heat, melt 1 teaspoon butter in a skillet and add 1/2 cup of the egg mixture.  On a separate skillet, warm one tortilla to soften.
 
When the egg sets, flip and cook for another 30 seconds.
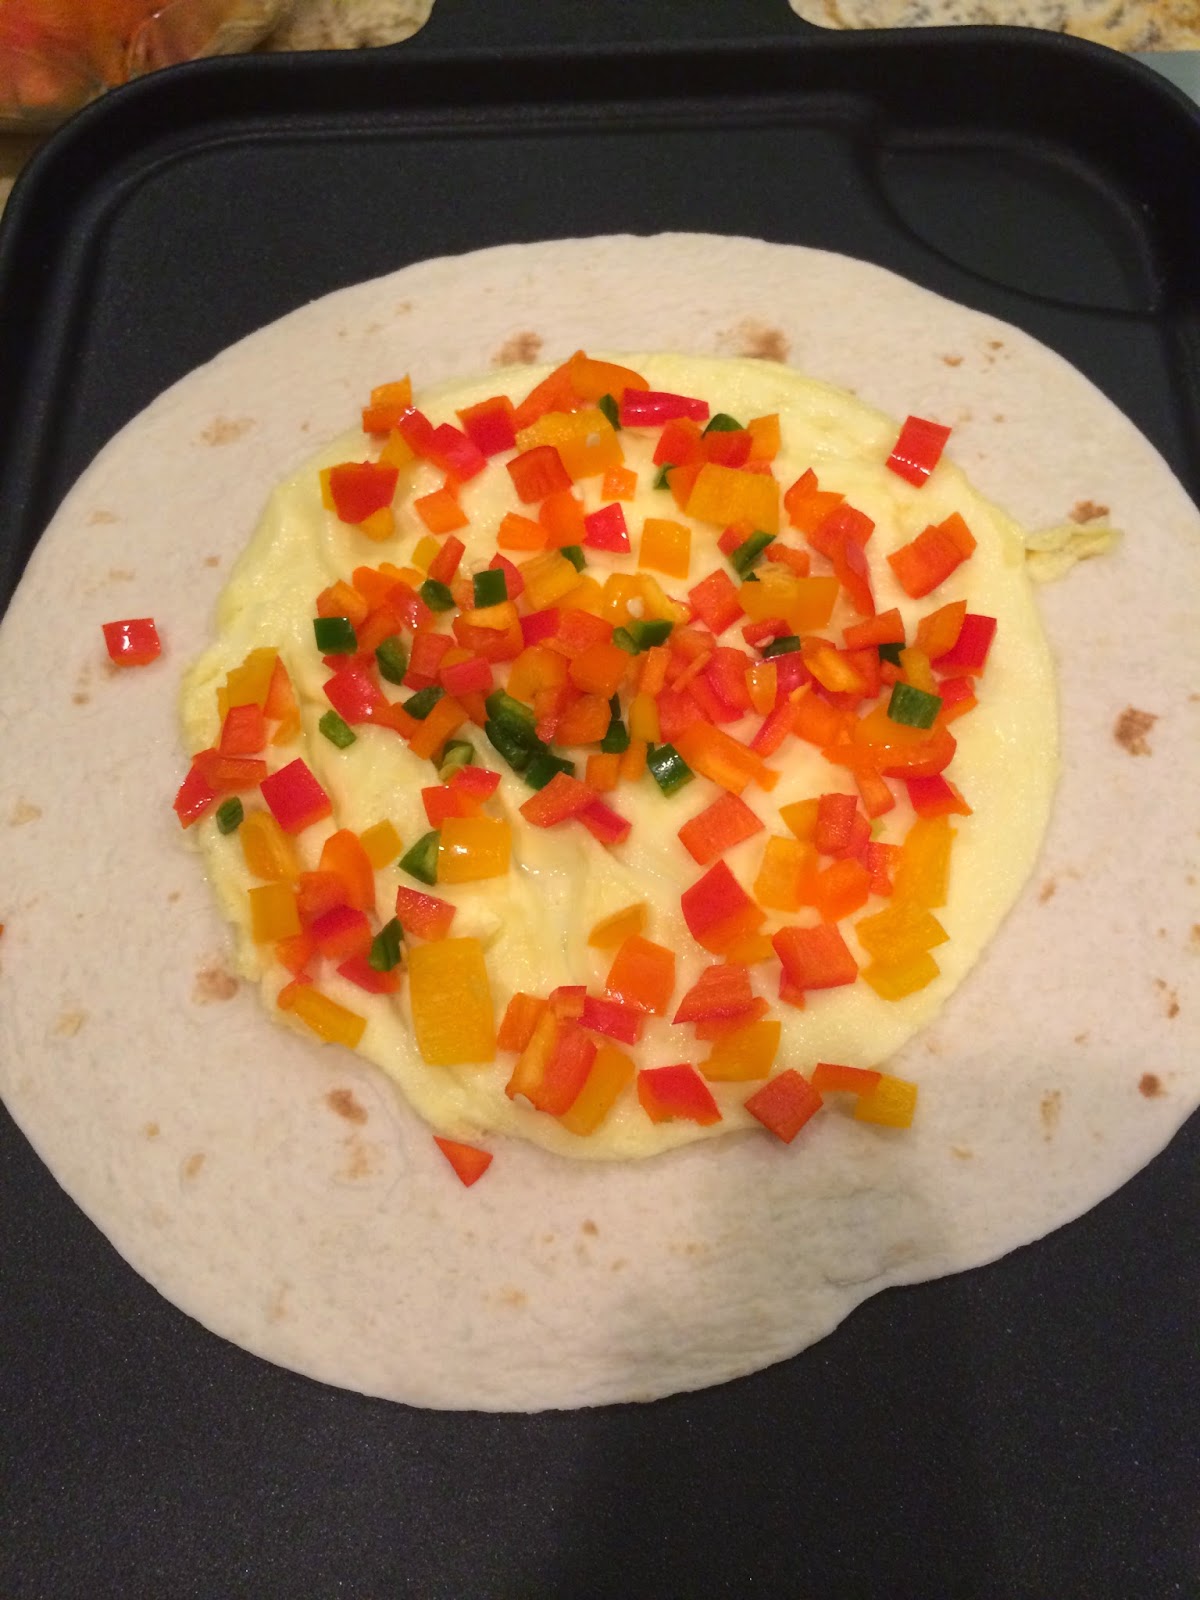
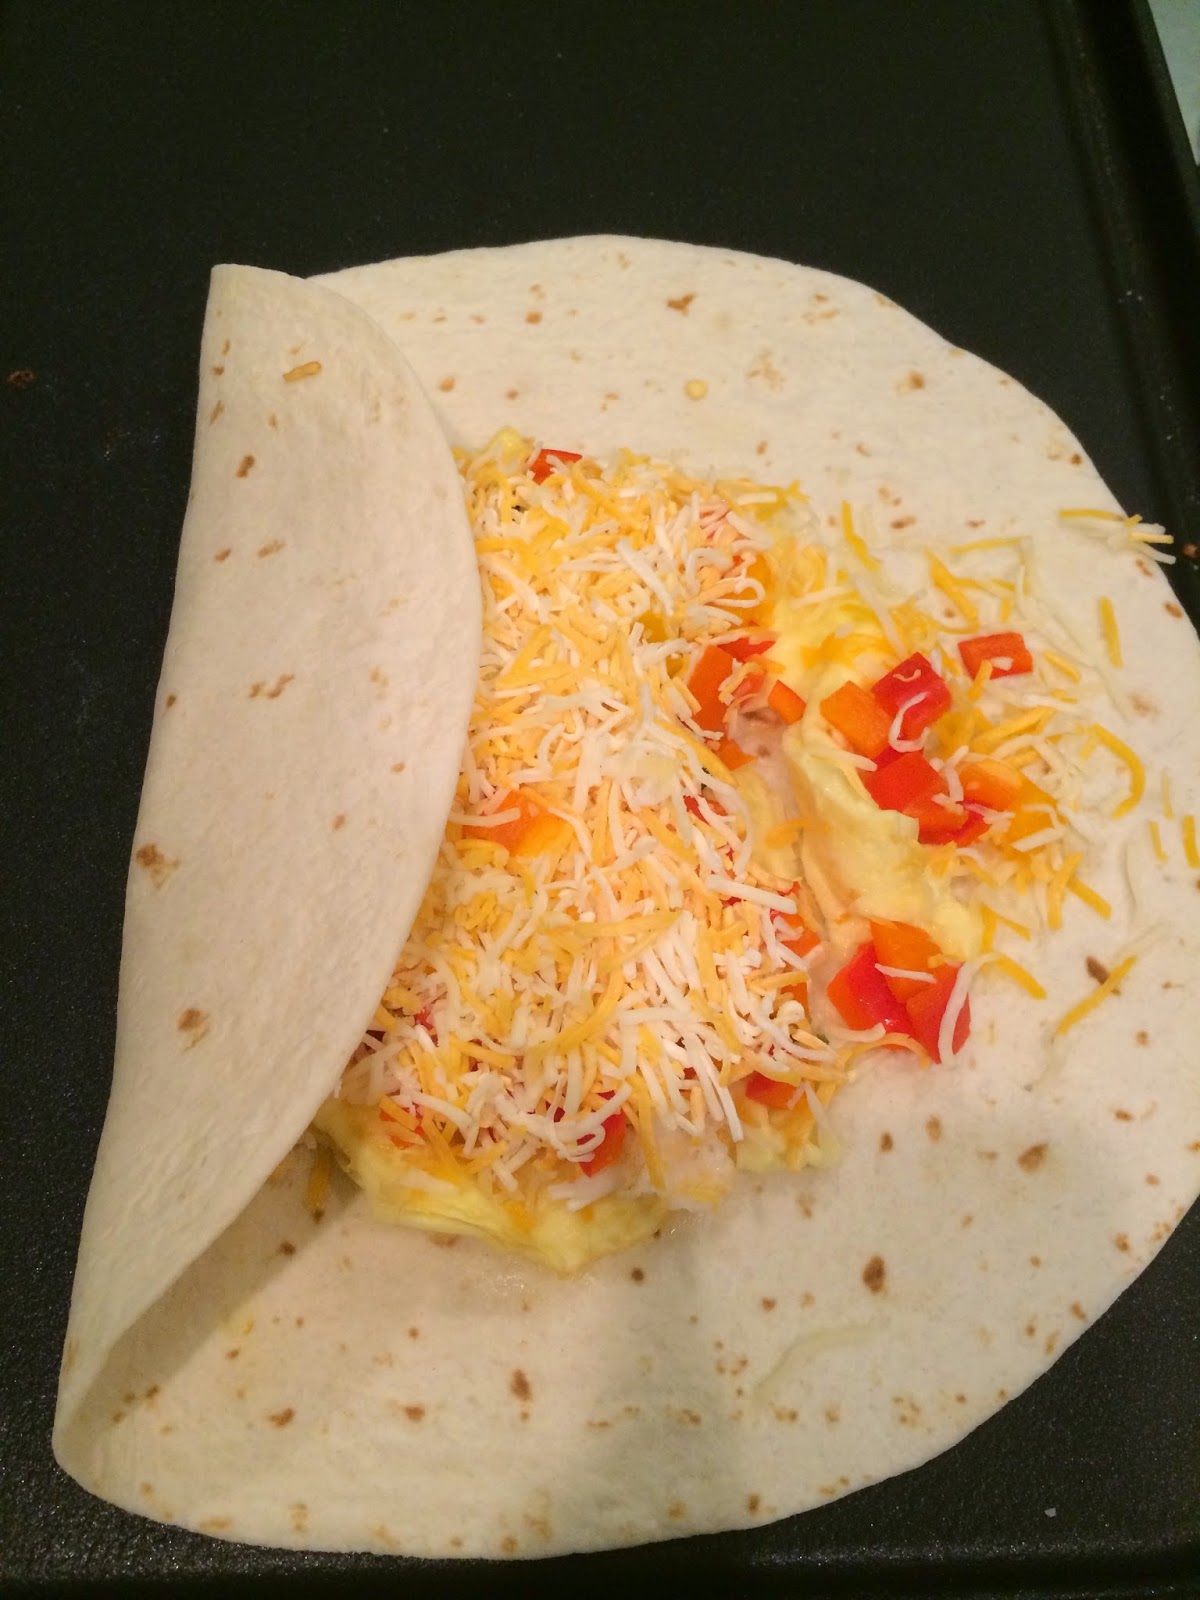
Place the cooked egg onto the softened tortilla.  Sprinkle with vegetables, cheese and salt.
 

Wrap the tortilla by folding in the sides towards the center and roll into a cylinder shape. 
To serve immediately, in a skillet, slowly brown the outside on the burrito while melting the cheese on the inside.  To store, wrap each burrito tightly in plastic wrap and freeze until ready to use.  For a printer friendly copy of this recipe, go to Breakfast Burritos. Enjoy!

Sunday, August 3, 2014

Tomato Basil Parmesan Soup

One of my favorite comfort foods is Creamy Tomato Soup with a grilled cheese sandwich, and I shared my go to recipe with you in 2012.  I never felt the need nor set out to replace this recipe until I began experimenting with some ingredients in my refrigerator.
 

It took several tries, but I believe I have improved upon my original Creamy Tomato Soup.  Although it still has the delicious tomato taste, this new version adds body and texture that makes the soup even more satisfying. 

Ingredients:
§     1/4 cup vegetable oil
§     3 cans diced tomatoes with juice
§     1 cup finely diced celery
§     1 cup finely diced carrots
§     1 cup finely diced onions
§     1 tablespoon fresh thyme or 1 teaspoon dried
§     4 tablespoon fresh basil or 1 tablespoon dried
§     1 bay leaf
§     1 tablespoon tomato paste
§     4 tablespoon sugar
§     4 cups chicken broth
§     1/2 cup butter
§     1/2 cup flour
§     1 cup parmesan cheese, freshly grated
§     1 1/2 teaspoons salt
§     1/2 teaspoon black pepper
§     2 cups half and half, warmed

Directions:

Chop onions, carrots and celery.

Heat oil in a 4 quart soup pot.  Add celery, onions and carrots and sauté for 5 minutes.


Add basil, oregano, bay leaf, tomatoes and chicken broth. Bring it to a boil, reduce heat and simmer approximately 15 minutes until carrots are tender.


To increase richness and add tomato flavor, stir in tomato paste.  Add sugar to cut the acidity of the tomato paste.
 

HINT:  Tomato paste freezes well and I use it often to increase tomato richness to recipes.  Whenever I us a tablespoon or two from a can of tomato paste, I freeze the remainder in single tablespoon portions in an ice cube tray or small plastic cup.


While soup simmers, prepare a roux.  In a small saucepan, melt butter over low heat; add flour and cook, stirring constantly, 5-7 minutes.
 

Slowly stir in 1 cup hot soup.  Add another 3 cups and stir until smooth. Add back into soup pot.  Simmer, stirring constantly, until soup begins to thicken.


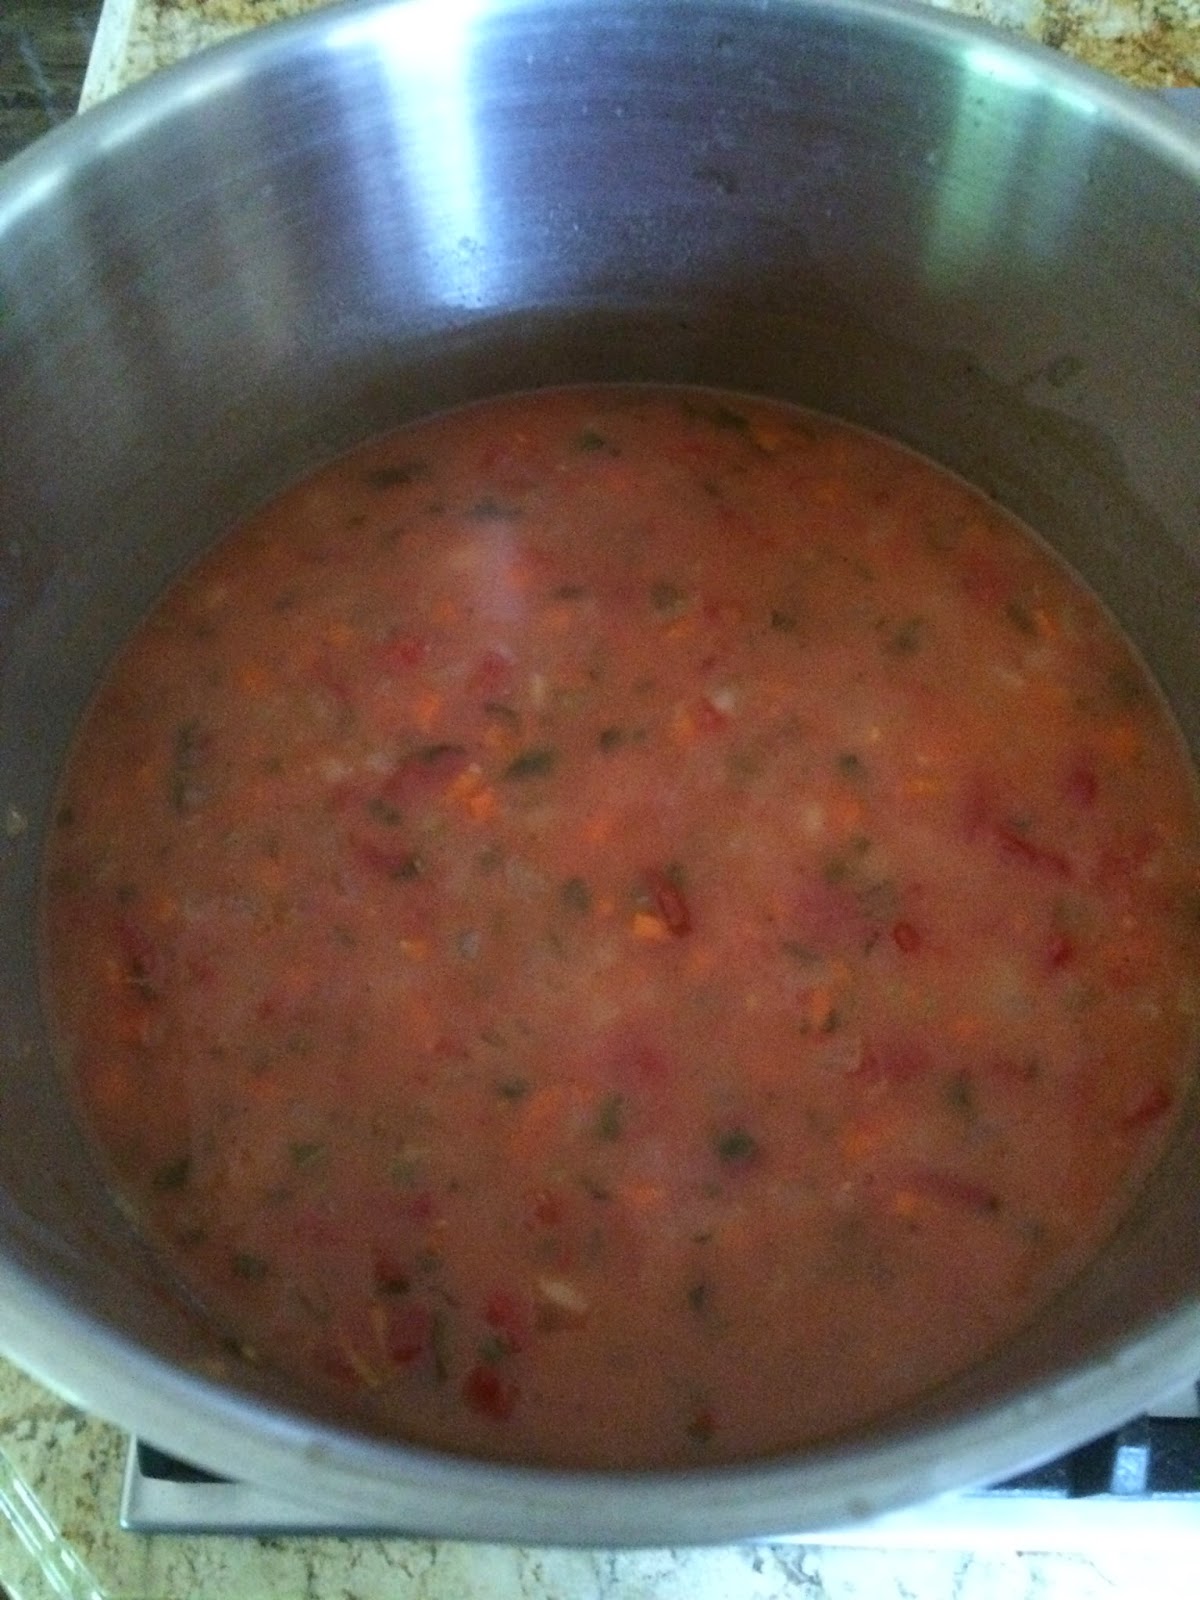
This chunky soup is beautiful and delicious, but I like mine smoother, so I use an emersion blender for about 5 or 10 seconds which is just enough to chop the vegetables smaller but does not liquefy them.


While whisking to blend, sprinkle Parmesan cheese slowly so it does not clump.


Stir in warmed half and half, salt and pepper. Simmer over low heat 15-20 minutes, stirring occasionally. Makes about 2 quarts (about 8 servings)
 

For a printer friendly copy of this recipe, go to Tomato Basil Parmesan Soup. Enjoy!