Sunday, April 22, 2012

Chicken Francaise

I was recently contacted by a friend who tried one of my recipes with a complaint that the dish didn’t taste as good as when I made it for her.  After a few questions, she admitted that she didn’t add salt as the recipe called for.  “If someone wants salt, they can add it at the table,” was her reasoning. 

The difference between tasteless food and tasty food is salt.”  Salt is a flavor enhancer.  When added while cooking, salt brings out the flavor in food and makes it delicious; when added to food after it has finished cooking, all it does it make the food salty.  I use kosher salt for everything except filling my salt shakers.  I believe kosher salt is less likely to make food taste salty or give you that salty burn. 


If you are under 25 years old, you probably have never heard of Chicken Francaise or other classics like Chateaubriand and Steak Diane, which have disappeared from menus over the past few decades.  Although it may have gone out of style in the 90's when Nouvelle Cuisine became popular, I continued to make this delicious dish, and it is still one of My Most Requested Recipes.


Ingredients:
  • 4 skinless, boneless, chicken breasts
  • All-purpose flour, for dredging
  • Kosher salt and black pepper
  • 3 large eggs
  • Grated parmesan cheese, for dredging
  • 4 tablespoons unsalted butter
  • 2 tablespoons vegetable oil
  • 1/2 cup dry white wine
  • 1 cup chicken broth
  • 1 lemon
  • 1/4 cup chopped flat-leaf parsley
  • 1 lb. Orzo pasta


Directions:

Cut the skinless, boneless chicken breasts in half lengthwise. Place the chicken breasts between plastic wrap and pound them to 1/4" - 1/2" thick with a meat mallet.

In a separate pot, cook pasta according to the directions on the package.  Remember, pasta, like potatoes and grains, cook by absorbing the liquid in which they are cooked.  The better tasting the liquid, the better tasting your final dish.  That is why it is important to add salt to the liquid before cooking.  I am using Orzo pasta, but you can substitute any pasta to create a bed for the Chicken Francaise.


Unlike your typical dredge of flour, egg and bread crumbs, for Chicken Francaise I use flour, egg and grated parmesan cheese. 

Put flour in a shallow dish and add salt and pepper. In a second shallow dish, beat eggs, salt and a splash of water to make an egg wash. In a third shallow dish, add grated parmesan cheese.

Heat 2 tablespoons of butter in a large saute pan over high heat.  Add 2 tablespoons of vegetable oil to keep the butter from burning.  Dredge each chicken cutlet in the flour and shake off the excess.  Dip the floured chicken into the egg wash and allow the excess to drip off.  Next, dip the chicken into the grated parmesan cheese until it is completely covered.  


Reduce heat to medium and add chicken to the hot oil and butter and saute for 2- 3 minutes until golden brown.  Turn and saute the chicken until it is cooked thoroughly and golden brown, approximately 2 -3 minutes longer. 

Remove the chicken to a large platter in a single layer and keep warm.


In the same saute pan over medium heat, add the white wine and juice of 1 lemon and cook for 1 minute.  Add chicken stock and continue to cook for another minute. Taste for seasoning and add salt and pepper, if needed.  Return the chicken breasts to the saute pan to absorb the sauce.  Turn off the flame and add the remaining 2 tablespoons of butter. 

If you add the butter while the pan is on the flame, the high heat would make the butter separate and look oily. By removing from the heat before adding the butter, the butter will slowly melt, thicken the sauce and make it creamy. Add chopped parsley and serve over pasta. 

 
For a printer friendly copy of this recipe, go to Chicken Francaise.  Enjoy!

Monday, April 9, 2012

Shrimp and Grits

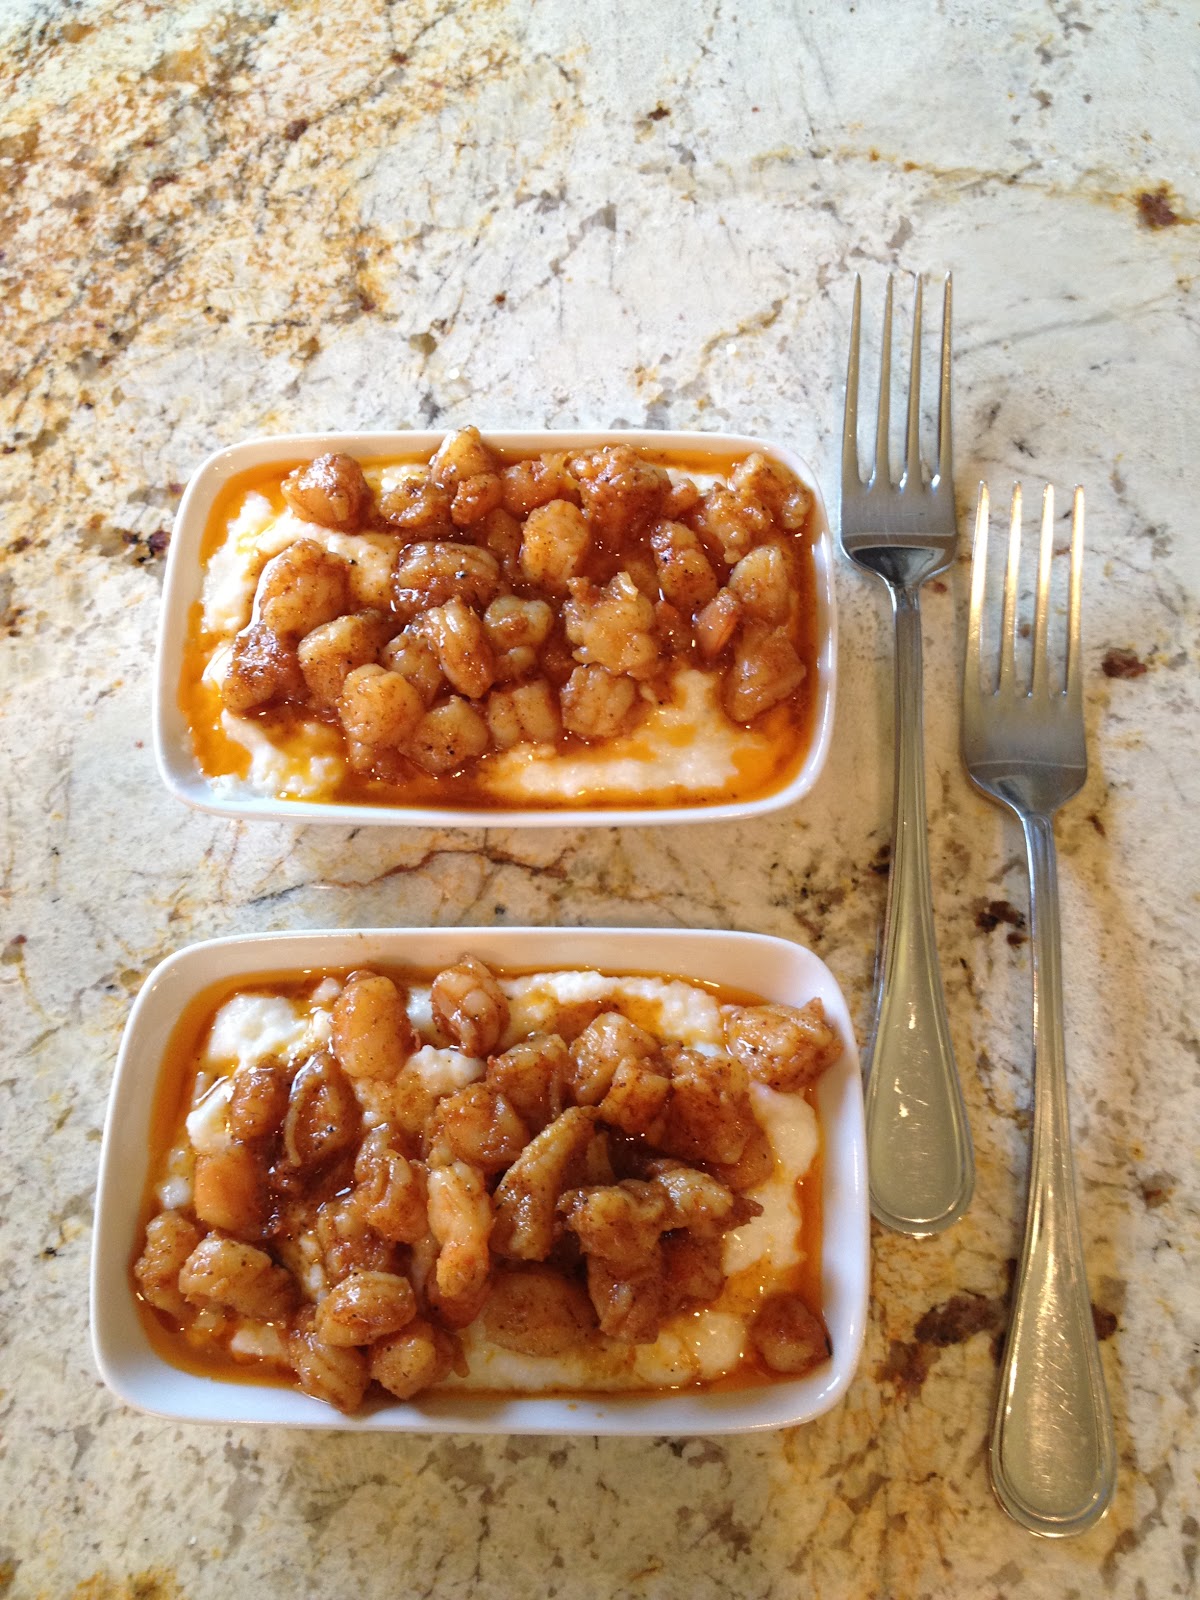
I recently hosted the Bluegrass Country Club women's monthly poker game at my home.  Little did my guests know that I had an ulteriormotive for preparing tapas for dinner.  I saw this as a perfect opportunity to get feedback on some of my dishes and help to determine which recipes I would post next.  Although quite a few of my selected dishes created a buzz, by far the Shrimp and Grits was the winner.
Shrimp and Grits Tapas
Shrimp and Grits

After taking the first bite,  the comments are always the same, "These grits are so cheesy, creamy and buttery." I totally agree with that description, but these grits contain no cheese, no cream and no butter.  The secret to my delicious and creamy grits is milk.
Grits Ingredients:
  • 2 cups whole milk
  • 1/2 cup grits (not instant)
  • 1 teaspoon kosher salt
  • 1/2 teaspoon garlic powder
Directions:
In a small saucepan begin warming the milk.  When milk is warm but not yet hot, whisk in the grits and add salt. Grits, like pasta and potatoes, cook by absorbing the liquid in which they are cooked.  The better tasting the liquid, the better tasting your final dish.  That is why it is important to add salt to the liquid before cooking.  Continue stirring grits over medium-low heat until all of the milk is absorbed and the grits are thick and creamy, about 10 minutes.  Remove from heat and stir in garlic powder.  to add richness to the grits, you may want to add 4 tablespoons of butter (optional).  Cover to keep warm.  
Although now days, every supermarket and most good restaurants have their signature dry rub, I choose to make my own.  I'm not a fan of the spice, cumin, one of the main and overwhelming flavors in most dry rubs.  They say "you either love it, or hate it."  I happen to be of the second group.  Yes, I know what you're thinking...."How can you have a true dry rub without cumin?"...and you're right, so I do add a little, but it's not the primary flavor. 

If you like the flavor of cumin, feel free to use any of the prepared dry rubs.

Dry Rub Ingredients
  • 4 Tablespoon Kosher Salt 
  • 4 Tablespoon Brown Sugar
  • 3 Tablespoon Garlic Powder
  • 2 Tablespoon Season Salt
  • 1 Tablespoon Paprika
  • 2 Tablespoon Black Pepper 
  • 1 Tablespoon Paprika
  • 1 Tablespoon Onion Powder 
  • 1 Tablespoon Chili Powder
  • 1 Tablespoon Cayenne Pepper 
  • 1/4 teaspoon Ground Cumin 
Directions:
In a large bowl combine all the ingredients and mix well.  Store in an airtight container.  I save the containers in which I buy spices at the supermarket.  When they are empty, they make perfect shakers for my homemade dry seasonings and rubs. This rub is one of my favorite.  I use it in many of my dishes and always when I grill meat, fish or poultry. 

Shrimp Ingredients:
  • 10 - 12 Peeled and Deveined Shrimp 
  • 2 - 3 Tablespoons Dry Rub
  • 2 Tablespoons Butter
  • 1 Tablespoon Oil
  • Chopped Parsley (optional)
Directions:
For tapas, rinse the shrimp under cool water.  Cut the shrimp and season well with dry rub. Melt butter in a large skillet over medium-high heat.  Add 1 tablespoon of oil to keep the butter from burning.  Add the seasoned shrimp and sauté until the shrimp turn pink, less than 1 minute.  Turn the shrimp and repeat until pink, less than 1 minute.  The cooking time will vary depending upon the size of the shrimp.  Remove from heat and add a squeeze of lemon juice.
 
Spoon the warm grits into shallow bowls and top with the shrimp.  Serve with lemon wedges.
In the summer, I grow parsley in my herb garden.  I like the way the chopped parsley adds color, and a little flavor, to this dish. (Yields 6 Tapas / 2 Dinners)


The whole shrimp will take a little longer, about 1 minute per side.

Shrimp and Grits Tapas
Shrimp and Grits

For a printer friendly copy of this recipe, go to Shrimp and Grits.  Enjoy!

Sunday, March 25, 2012

Hot Pepper Jelly

I never heard of Hot Pepper Jelly until I moved to the south 20 years ago.  I remember attending a cocktail party and seeing a block of cream cheese with a red speckled sauce sitting alongside a bowl of crackers.  I had no idea what it was, but I am willing to try anything….especially when cream cheese is part of the dish. 

I fell in love at first bite with this delicious, sweet and spicy southern staple.  I tried to recreate that moment with purchased jars of jelly, but never did until I perfected this simple recipe. 

If you feel the need to make dozens of jars and store them in your pantry, you can boil the jars and begin the canning process, but this jelly is so quick and simple to make, unless I'm making a huge amount to distribute as gifts from my kitchen, I make it in small batches and keep it in the refrigerator.


I must admit, when I got into the kitchen today I had no idea what I was going to make.  Most people will choose a recipe and go to the market for ingredients.  I keep a pretty well stocked pantry, so when I feel like relaxing on a Saturday afternoon…which to me means puttering around in my kitchen….I inventory my pantry and refrigerator for inspiration.


Today I found my inspiration from a bag with just a small handful of mini red and yellow peppers that hadn’t made it into one of this week's salads.


Ingredients:
·         ¾ cups chopped red (and/or yellow) bell peppers
·         ¼ cup chopped fresh hot jalapeno or red pepper
·         1 ½ cups apple cider vinegar
·         6 cups sugar
·         4 ounces pectin (Certo recommended)
·         4 drops of red food coloring (optional)

Directions:
I've developed fairly good knife skills and like to see the tiny square pieces in my finished jelly, so I chop the peppers, but feel free to use a food processor. 

The last time I made this jelly, my friend Michael complained that it wasn't hot enough.  Since I'm taking one of these jars to Michael's house for our friendly, monthly poker game this week, I wanted to make sure I included each and every jalapeno pepper seed.  If you are not a fan of heat, leave out a few seeds.

In a saucepan, combine the pepper mixture, vinegar and sugar.


Bring to a rolling boil (a boil that doesn’t stop bubbling when stirred) on high heat, stirring constantly.  Remove from heat and add pectin. 


At this point, the pepper jelly is complete and delicious, but I like the vibrant color I get from adding just 4 drops of red food coloring (optional).


Although my favorite way to eat Hot Pepper Jelly is still with cream cheese on a cracker, you can find many recipes where it's included as an ingredient.  Today I'm using it as a dipping sauce for poppers.

For a printer friendly copy of this recipe, go to Hot Pepper Jelly.  Enjoy!

Sunday, March 4, 2012

Bacon Candy

I've wanted to write this Blog for quite a while, but always found reasons to put it off…mostly because as you’ll soon recognize, I am not a writer.  Today I realized that it’s not the writing that will bring you back each month but the recipes I’m asked to share each time I make one of my experiments for friends or family.

After the party to celebrate Meredith's birthday last night and the number of requests I got for recipes for both of the dishes I brought, I realized....IT'S TIME. Welcome to my Blog, appropriately named "My Most Requested Recipes." If I never created another recipe, I have enough in my repertoire to keep this monthly Blog active for years.

If I asked any of my friends or colleagues for a suggestion as to which recipe should be my first, I can guarantee that 99 out of 100 will name the “Bacon Candy.”  No matter where I bring these tasty treats, most of my evening is spent giving out the recipe and describing how it’s made.


The trick to these delicious bites is to begin with THICK BACON.  Although any thick bacon will work, I prefer to use the bacon packaged like this.


Ingredients:
  • Thick Bacon
  • Light Brown Sugar
  • Yellow Corn Meal
Directions:
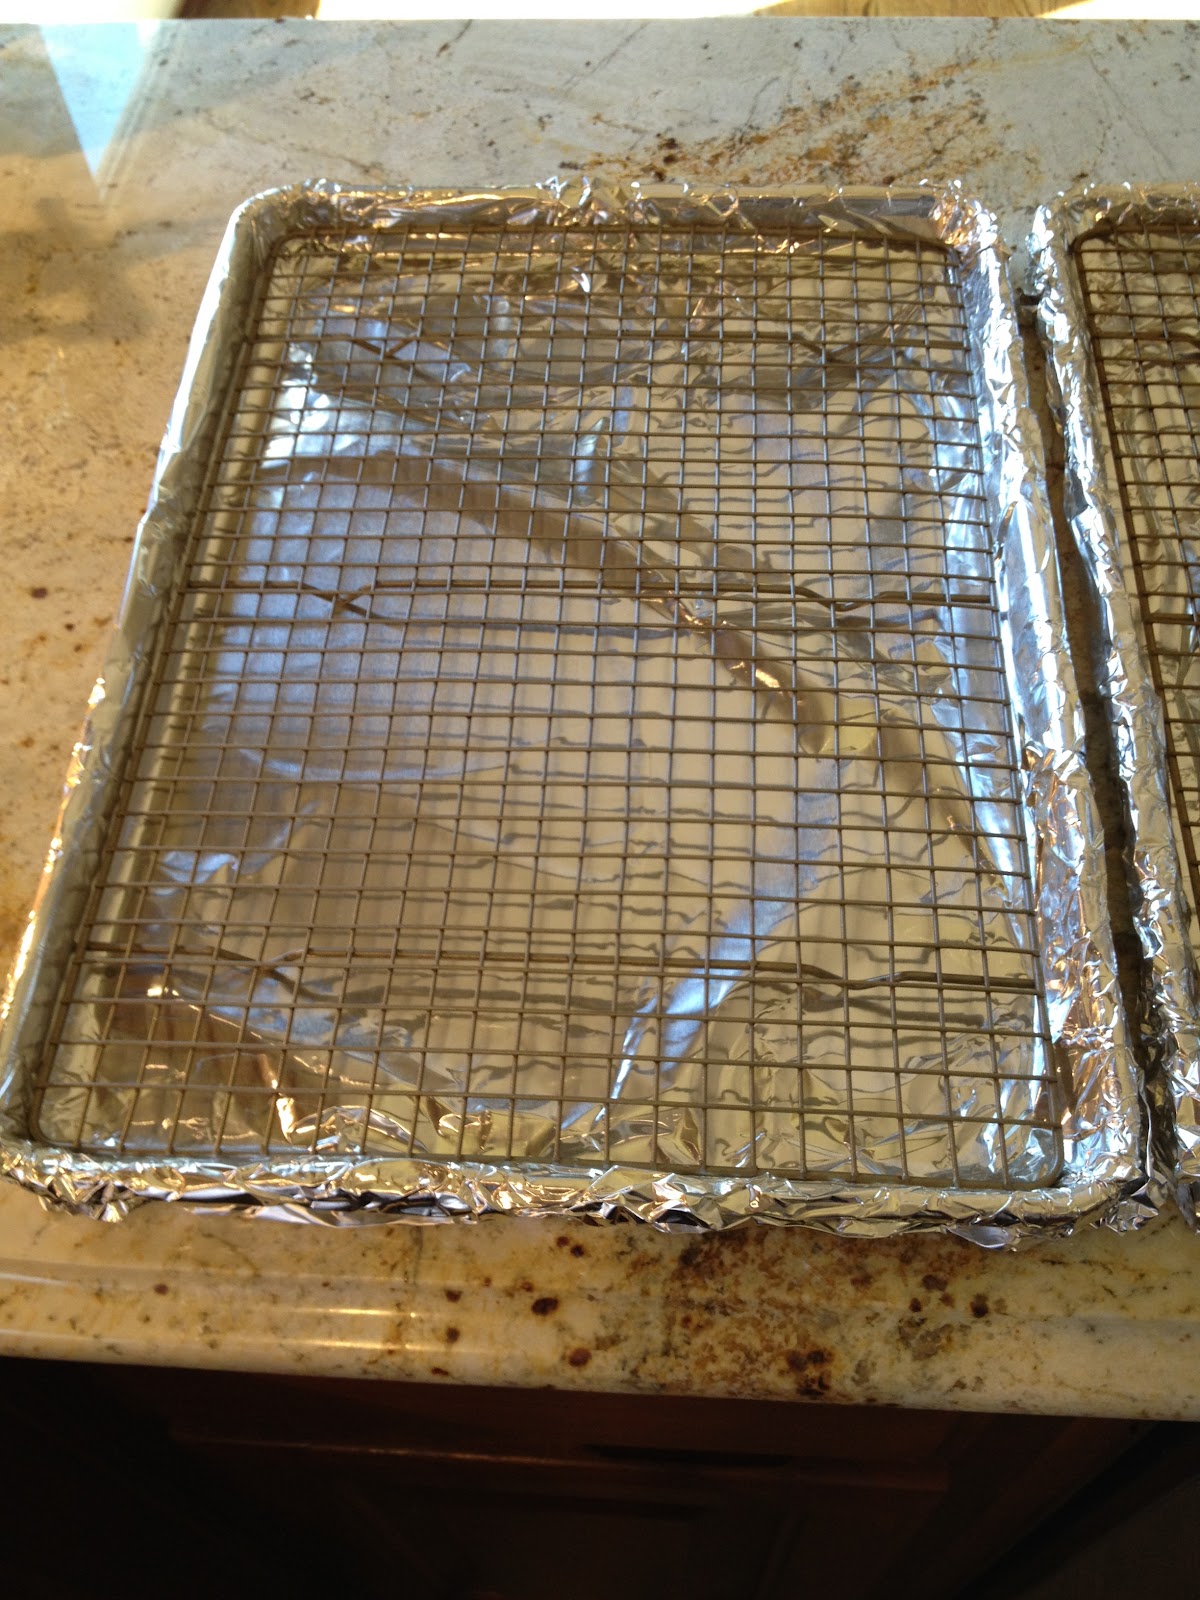
I don't like to spend a lot of time cleaning up, so I line my baking pan with heavy aluminum foil and spray the baking rack with non stick cooking spray.


Preheat oven to 350 degrees.  In a mixing bowl, combine the brown sugar and corn meal (1 cup of brown sugar to 1 T corn meal).  For this entire package of bacon, I will use approximately 3 cups of brown sugar and 3 T of corn meal.


Before separating the bacon, cut the slices into thirds.  One third of a slice creates a nice, 2 bite piece.  Dip each piece of bacon into the brown sugar/corn meal mixture to coat heavily and place onto the baking rack. If you run out of the brown sugar mixture before finishing, just make a little more.


The bacon will shrink a bit, so don't worry about placing the bacon too close together.  Bake until the bacon is red/brown, approximately 15 - 20 minutes depending on how thick your bacon is.  I like it a little charred around the corners.  Remove to cooling rack.  The bacon will not crisp until it cools.  Serve at room temperature.


If you reuse the baking pan, there is no reason to wash the wire baking rack but be sure to replace the aluminum foil. 

Well, there you have it....my very first Blog and my most requested recipe.  Please let me know what you think.  I welcome your thoughts on suggestions for how to make this better.

For a printer friendly copy of this recipe, go to Bacon Candy.  Enjoy!