Friday, June 13, 2014

Bananas Foster

My guests are always impressed when I announce that I am serving Bananas Foster for dessert.  I don’t know if it’s the flambé, the delicious sweet sauce served over ice cream or the belief that they could not reproduce this at home that impresses them so much.  I mainly choose this dessert because it is so easy to make and I typically have all of the ingredients in the pantry.  Frankly, I would rather spend my time and creativity preparing specialty hors d’oeuvres, appetizers and whatever I’m serving as the entrée. 
To make it even easier, early in the day I measure out all of the ingredients and place the sugar, butter and cinnamon on a disposable plate and place the liquor and rum in small disposable cups which I set on the frying pan and store on a shelf in my pantry until I’m ready to make the dessert.  By using disposables, this becomes a ‘one pan dessert,’ for easy clean up.  After clearing the dinner dishes I retrieve the frying pan from the pantry and begin preparing the Bananas Foster.  At this point all I have to do is slice the bananas which I do while the butter is melting. Quick, easy and impressive….it doesn’t get better than that.
 

HINT:
No matter how many bananas I buy, I always have one or two that are ripe and uneaten.  I peel and wrap the banana in plastic wrap and place it in the freezer.  Whenever I want to make Bananas Foster or bake banana bread, I simply remove it from the freezer and unwrap an unblemished banana with which to bake.

Ingredients:
§     4 ripe bananas, peeled
§     4 tablespoons unsalted butter
§     1 cup packed light brown sugar
§     3/4 teaspoon ground cinnamon
§     1/4 cup banana liqueur
§     1/2 cup dark rum
§     1 pint good quality vanilla ice cream
Directions:
Cut the bananas in half across and then lengthwise. Melt the butter in a large skillet over medium heat.
Add the brown sugar and cinnamon and cook, stirring, until the sugar dissolves, about 2 minutes.
Add the bananas and turning, cook on both sides until the bananas start to soften and brown, about 3 minutes.
Add the banana liqueur and stir to blend into the caramel sauce. Carefully add the rum and shake the pan back and forth to warm the rum and flame the pan. (Or, off the heat, carefully ignite the pan with a match and return to the heat.)
Shake the pan back and forth, basting the bananas, until the flame dies. 
Divide the ice cream among 4 dessert plates. Gently lift the bananas from the pan and place 4 pieces on each scoop of ice cream. Spoon the sauce over the ice cream and bananas, and serve immediately.  For a printer friendly copy of this recipe, go to Bananas Foster. Enjoy!

Sunday, May 4, 2014

Croque Monsieur and Croque Madame

My Facebook friends know that I recently returned from a wonderful, 10 day vacation in Paris, Venice, Florence and Rome.  When I travel I always like to sample the local cuisine. When I go to New York, I make sure to eat the world famous pizza I grew up on.  When I travel throughout the south, I indulge on barbecue.  In New Orleans I can't wait to eat Gumbo, and when I'm in Puerto Rico, my mouth starts watering when I think of the first bite of mofongo.  So it was no surprise to anyone when I ate my way through Europe and posted daily pictures onto Facebook to prove it. 

When we arrived in Paris, I couldn’t wait to get to a French Bistro to eat my favorite French signature sandwich, Croque Monsieur or Croque Madame.
 
For those of you who are unfamiliar, Croque Monsieur is the French Grilled Ham and Cheese Sandwich made with a creamy Béchamel.  A Croque Madame is a Croque Monsieur topped with a fried egg.  I’ve been home for several weeks and I can’t get this delicious sandwich which can be prepared for brunch, lunch or dinner off my mind.  With this recipe, it’s so simple to make, I don’t have to.

Béchamel Ingredients
§  2 tablespoons unsalted butter
§  2 tablespoons all-purpose flour
§  1 cup whole milk
§  Pinch of freshly grated nutmeg
§  1 small bay leaf
§  Salt and pepper to taste

Sandwich Ingredients
§  4 slices firm white sandwich bread
§  2 teaspoons Dijon mustard
§  1/4 pound thinly sliced cooked ham (preferably Black Forest)
§  1/4 pound coarsely grated Gruyere cheese, divided into 4 equal piles
§  4 tablespoons unsalted butter
§  2 large eggs

For the Béchamel :
Melt 2 tablespoons butter in small saucepan over medium heat. Add flour and stir 1 minute.

Gradually whisk in milk. Add nutmeg and bay leaf. Increase heat to medium-high and boil and continue whisking until sauce thickens, about 2 minutes.  Remove and discard the bay leaf.  Season with salt and pepper. 
For the Sandwich:
Preheat broiler. Place 2 bread slices on work surface.  Spread 2 slices of bread with Dijon mustard and top with half of the ham.
 
On the remaining 2 slices of bread, spread 1 1/2 – 2 tablespoons of Béchamel and sprinkle each with 2 ounces (1 pile) of the Gruyere cheese.
Close to form two sandwiches. 
In a skillet over low heat, melt 2 tablespoons of unsalted butter.  Add both sandwiches to the skillet and cook until deep golden brown, about 2 minutes per side. 
Transfer to a small taking sheet.  Spoon the béchamel sauce over both sandwiches and top with remaining cheese.
 
Broil until the cheese begins to brown, about 2 minutes.  Your Croque Monsieur is finished and ready to eat. 
I, however, prefer the Croque Madame sandwich.  To make the Croque Madame, heat the remaining 2 tablespoons of butter in a skillet over moderate heat until foam subsides, then crack eggs into skillet and season with salt and pepper.
Fry eggs until whites are just set and yolks are still runny, about 3 minutes. Top each sandwich with a fried egg and serve immediately.
For a printer friendly copy of this recipe, go to Croque Madame. Enjoy!

Sunday, April 6, 2014

Pot Roasted Potatoes

My mother emigrated from Europe, so the foods I grew up on were very different from most of my southern friends.  When we compare childhood delicacies, country ham and biscuits or chicken and dumplings were not in my repertoire.  I never heard of poke sallet or milk gravy nor did I ever eat a biscuit that didn’t come out of a can until I moved to Nashville.  Typical choices at our dinner table were stuffed cabbage, chicken matzo ball soup, chopped liver and these potatoes.
 

I had the hardest time naming them, since the name they were given by my mother originated from either the Russian or Polish language.  My brother and I spent an hour tossing around names like potted potatoes or braised potatoes.  I even made up the word ‘broasted potatoes,’ but I was afraid, and rightfully so, that no one would know what this newly made up word meant.  So I settled on “Pot Roasted Potatoes.”  These potatoes have no meat so don’t confuse them with Pot Roast, but they are made in the pot on top of the stove and are cooked for a long time.  You may not like the name, but I’m confident you will love these potatoes.

Ingredients:
§     3 – 4 pounds of russet potatoes, cut into 1 – 1 1/2” cubes
§     1 onion, diced
§     2 tablespoons vegetable oil
§     3 – 4 carrots, grated
§     3 – 4 stalks of celery, diced
§     1 – 2 bay leaves
§     1 teaspoon garlic powder
§     1 teaspoon dried minced onion (optional)
§     1 teaspoon Lawry’s season salt
§     1 carton chopped mushrooms or jar
§     4 tablespoons salt and pepper to taste
§     1 stick of butter or margarine
§     Fresh Dill, chopped

Note:
I use fresh onion and mushrooms, but my mother’s original recipe calls for minced onion and cans of mushrooms.

Directions:
In a large pot, heat vegetable oil over medium heat.  Add diced onion and cook until translucent. 


Peel and dice potatoes making sure that all are relatively the same size, and add them to the pot.  Mix to coat all potatoes with the oil. 

Add grated carrots, celery, bay leaves, garlic powder, dried onion, Lawry’s season salt, salt and pepper.
 

Add 1 cup of water, cover and cook over low heat stirring occasionally.


When potatoes have turned to a golden color, add mushrooms, butter and chopped dill.
  

Serve alongside fish or meat. 

For a printer friendly copy of this recipe, go to Pot Roasted Potatoes. Enjoy!

Sunday, March 2, 2014

Shortbread Cookies

I love cookies.  I love cookies so much that each and every morning when my alarm goes off, I shuffle to the kitchen for my morning cup of coffee but never take the first sip before stuffing a cookie into my mouth.  I thought I was the only one who loved shortbread cookies, because great shortbread cookies are so hard to find. 

Whenever I visit a cookie bakery, I find chocolate chip, white chocolate chip, chocolate-chocolate chip, peanut butter, sugar and snickerdoodle....but shortbread cookies are nowhere in sight.  I believed that more bakeries would bake them if more people liked them, but after I began making them, I found that most people are like me and love these crispy, buttery gems. 

I still don't understand why great shortbread cookies are so hard to find, but with this quick and easy recipe, you can always find them in my kitchen.

Ingredients:
§     3 1/2 cups all-purpose flour
§     1/4 teaspoon salt
§     3/4 pound unsalted butter, at room temperature
§     1 cup sugar, plus extra for sprinkling
§     1 teaspoon vanilla
§     6 to 7 ounces semisweet chocolate, finely chopped

Directions:
Add the flour and salt to a food processor and pulse to combine. Add in the butter and vanilla. Pulse together just until the dough is formed.

Dump dough onto a surface dusted with flour and shape into a flat disk. Wrap in plastic and chill for 30 minutes or freeze for up to a month.  Line a cookie sheet with parchment paper or a Silpat.  Preheat oven to 350 degrees. 


Roll the dough 1/2-inch thick and cut with a cookie cutter. Place the cookies on the cookie sheet, sprinkle with sugar and bake for 20 to 25 minutes or until the edges begin to brown. Remove from the oven and let cool on the cookie sheet for 5 minutes. Transfer cookies to wire racks and cool until room temperature.  When the coo0kies are completely cooled, place them on a baking sheet lined with parchment paper. 

Put half of the chocolate in a microwave safe glass bowl or mug.  I like to use a glass mug so I can dip my cookies into the chocolate.  If you don't have one, melt the chocolate in a glass bowl and transfer to a glass for dipping.  Microwave on high power for 30 seconds.  Stir with a wooden spoon. Continue to heat and stir in 30-second increments until the chocolate is just melted.  To temper the warm chocolate, add the remaining finely chopped chocolate and allow it to sit at room temperature, stirring often, until it's completely smooth.  The stirring makes the chocolate glossier.
 

Drizzle or dip 1/2 of each cookie with just enough chocolate to coat it.
 
Shortbread Cookies store well at room temperature in an air tight container.  For a printer friendly copy of this recipe, go to ShortbreadCookies. Enjoy!


Sunday, February 2, 2014

Mushroom Barley Soup

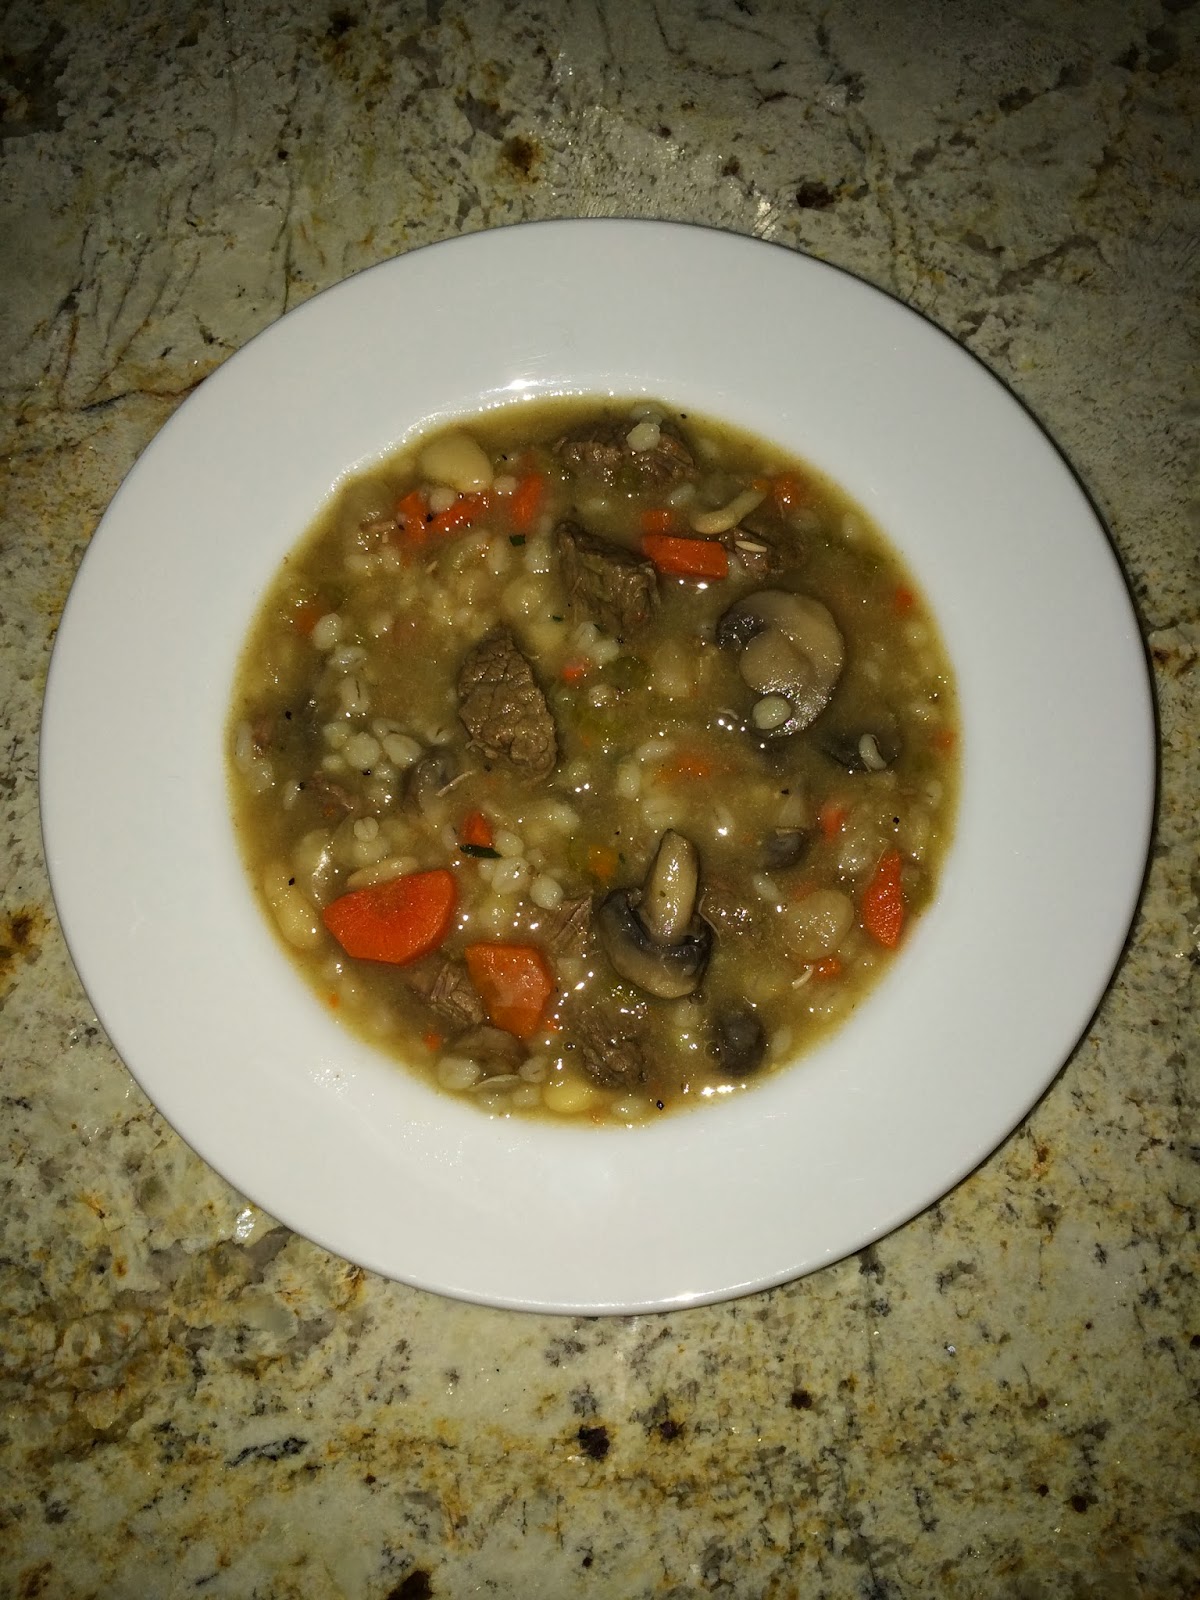
I’ve been living in the south for over 20 years so when I feel the need for comfort food, I visit one of the many meat-and-three restaurants that call Nashville home.  For those of you who are unfamiliar with the term, a meat-and-three restaurant is typically a family owned restaurant where you pick one meat from a daily selection of 3–6 choices (such as fried chicken, country ham, pot roast, country-fried steak, meatloaf or pork chop) and three side dishes from a list that may include up to a dozen options (such as mashed potatoes, macaroni and cheese, squash casserole, creamed corn, green beans or turnip greens).  The meal is often served with biscuit or cornbread and sweet iced tea.  Perhaps not the healthy vegetables you might have thought of, but definitely what we in the south consider comfort food. 


But when the temperatures in Nashville slipped to single digits this week, I longed for the comfort foods of my childhood which could only be found in my mother’s kitchen or a New York Deli.  I couldn’t wait to pull out my big soup pot and make one of my northern comfort foods, Mushroom Barley Soup.  The temperature may have been frigid, but the bowl of soup warmed my soul. 


Ingredients:
§  2 pounds chuck or stew meat, cut into bite sized cubes
§  3 tablespoons vegetable oil
§  1 pound package of carrots, peeled and sliced
§  1 small bunch of celery, sliced
§  3 quarts of beef broth
§  1 bay leaf (optional)
§  1 large onion (whole or finely diced)
§  1 cup pearl barley
§  1 cup baby lima beans (optional)
§  1 pound sliced white mushrooms
§  Salt and Pepper to taste  (I added 1 tablespoon salt and 1 teaspoon pepper)

Directions:

Chop the carrots into small pieces and set aside.


Chop the celery into small pieces and set aside.


Heat 3 tablespoons of vegetable oil in a large pot over medium high heat.  Add the beef and brown.  Scrape the bottom of the pot to loosen the brown bits of delicious goodness. 


Pour the beef broth into the pot and bring to boil.  The meat will emit a frothy scum which I like to skim off. 


Add the chopped onion, carrots, celery, bay leaf, salt and pepper and bring to boil.  Add the mushrooms, barley and baby lima beans.


Reduce heat to low simmer and cook uncovered for approximately 2 hours or until the barley and baby lima beans are completely tender and the soup is nicely thickened.  If the soup becomes overly thick, add water or broth. Serve hot. 


For a printer friendly copy of this recipe, go to Mushroom Barley SoupEnjoy!

Notes:
§      In the past, I used water to cook this soup but since broth is so readily available and adds a depth of flavor I now use broth. You can make this soup using water only, broth only or a combination of both.  If you want the soup to have a richer flavor, you can always a few bouillon cubes.  If you want to keep it vegetarian, leave out the beef and use vegetable stock for your base.
§      When making soup, it is less important to stick with the exact measurements than it is to make it appeal to your taste.  If you like a thicker soup, add more barley.  If you like, add more vegetables.  I prefer a thinner soup, so I add a few more cups of liquid at the end.
§      Mushroom Barley Soup does not typically have baby lima beans but I love them and feel they add texture and taste to the soup.  If you don’t like beans, leave them out.
§      I like adding diced onion to my soup, but my mother would add a whole, peeled onion.  When the onion is soft and has flavored the soup, remove and toss. 

Sunday, December 1, 2013

Cheese Ball Pops

One 2013 food trend is serving ‘anything on a stick.’  We’ve seen skewered appetizers, entrées and desserts.  I’ve even seen salads on skewers this year.
 
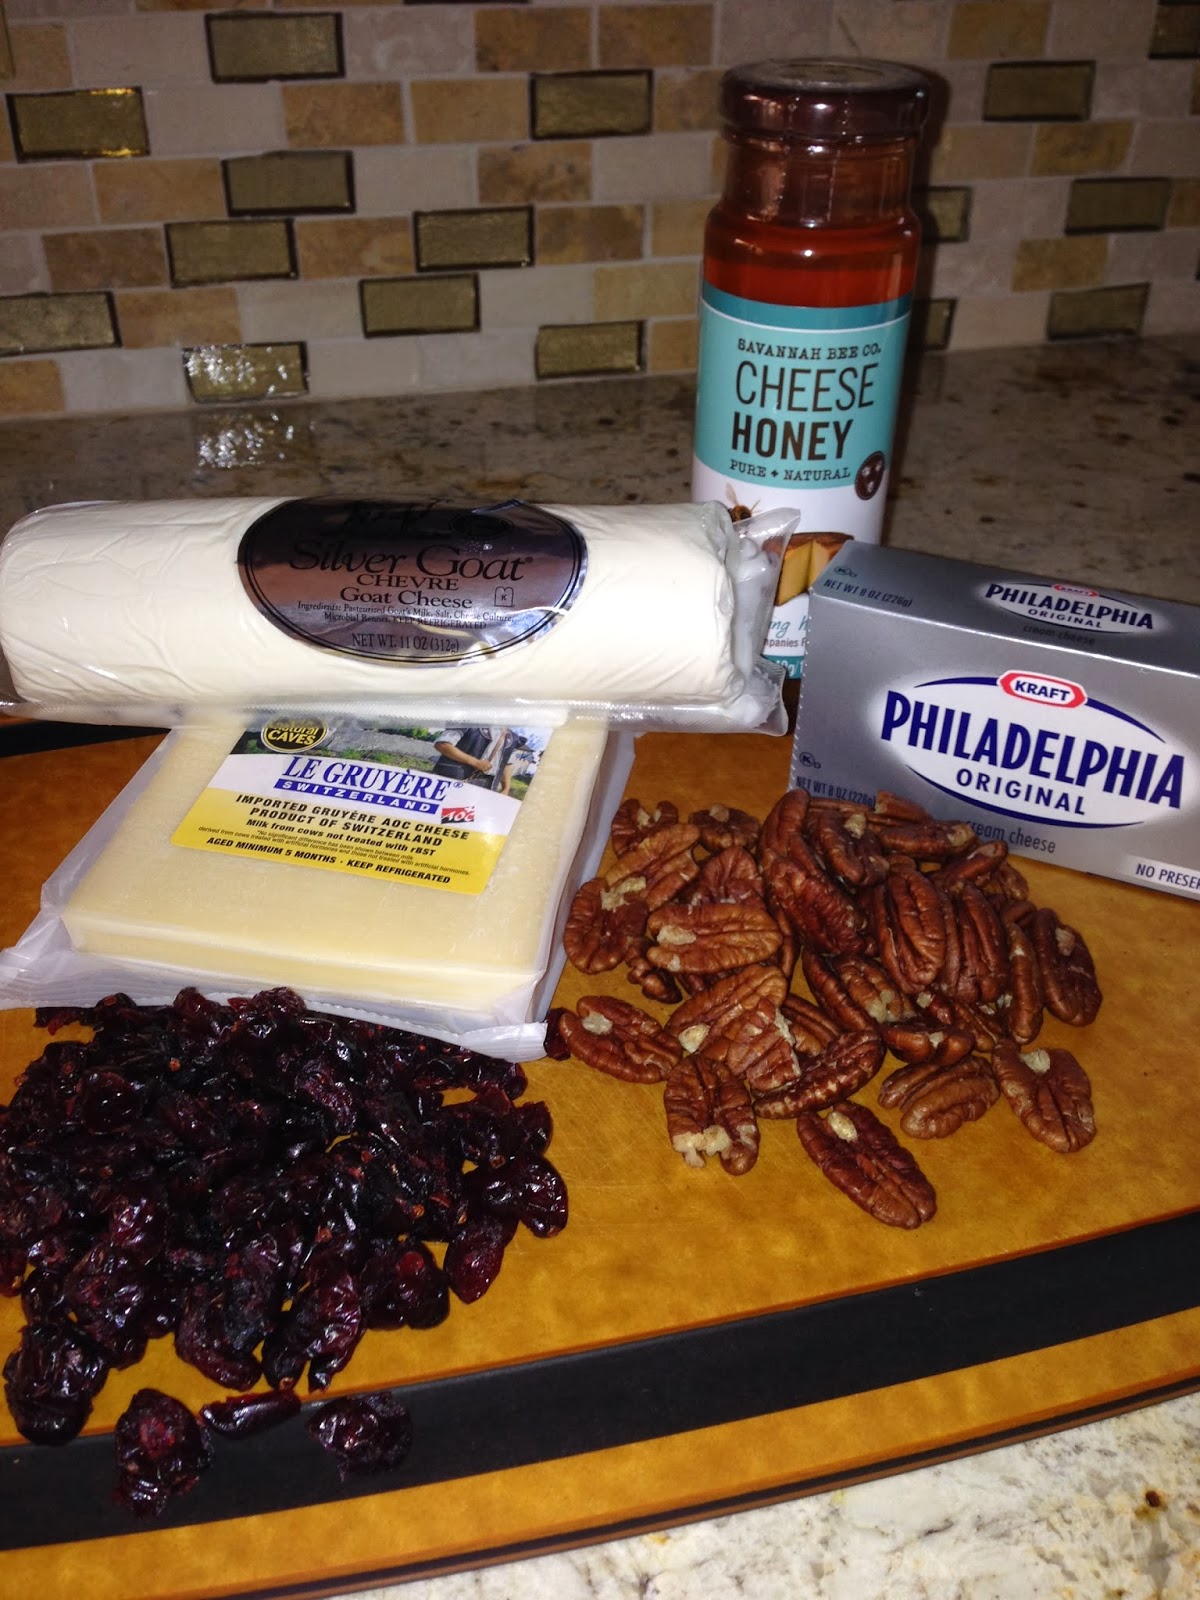
My fear is that sticks will no longer be in style for 2014 and I’ll be left with a drawer filled with all sizes and lengths so I decided to create a cheese and fruit platter on a stick.  I combined several of my favorite cheeses and call it “Cheese Ball Pops.” I love goat cheese, so I always use it when appropriate...and sometimes when not, but you can substitute your favorite cheeses to make it the perfect hors d’oeuvre for when you next entertain.  If you don't like goat cheese, try feta.  

Ingredients:
§  1/2 cup finely chopped pecans
§  1/2 cup finely chopped dried cranberries
§  4 ounces crumbled goat cheese (or feta cheese), at room temperature
§  4 ounces cream cheese, at room temperature
§  1 cup grated Swiss cheese
§  2 teaspoons honey
§  16 lollipop sticks

Directions:

Combine finely chopped pecans and cranberries in a shallow dish.
 
In a food processor, mix the cream cheese, goat cheese, Swiss cheese and honey until it’s combined and smooth. Place in refrigerator for 15 – 20 minutes. 
Scoop out the cheese mixture with tablespoon or small ice cream scoop and roll each spoonful into a ball with the palms of your hands. Roll each ball into the pecan-cranberry mixture, coating all sides evenly.
Place each ball on a tray lined with parchment or waxed paper. Insert a lollipop stick into the center of each ball. Cover the tray in plastic wrap and transfer it to the refrigerator to chill and firm for at least one hour. 
Remove the tray from refrigerator 15 minutes before serving.  Serve with crackers.  For a printer friendly copy of this recipe, go to Cheese Ball PopsEnjoy!