Sunday, July 28, 2013

Hot Corn Dip

Twice a month I play poker with friends.  The first is a ladies game we play in the “Women’s Game Room” at the country club.  There are 6 – 8 women who get together for a low stakes, friendly game where the conversation is more about birdies and bogies than poker, but I love these women and look forward to the game.  The second game is hosted by my friend and co-foodie, Michael.  At this game there are 9 men and me.  I can’t begin to tell you about the conversation at that table, and I look forward to it every month. 

Michael always cooks dinner and everyone is required to bring something.  Most show up with a bag of chips, 6-pack of beer, M&Ms or a box from a local bakery, but we can always count on Mary to send a delicious casserole with Bill and I take the opportunity to try out some new recipes and always bring something homemade.  It’s a pleasure to cook for these men.  They are so appreciative and always complimentary. 


This week I brought my Hot Corn Dip.  With the amount of attention and number of compliments this dip received, you would have thought it took a long time and a lot of effort to prepare.  It is not one of my original recipes but it is one of my favorite go-to dips and has become one of My Most Requested Recipes.

It is easy to prepare, contains ingredients I always have on hand, and I can assemble it ahead of time and bake it at the last minute.  Nowadays fresh corn in the husk is available all year long so I rarely use canned corn, but for this dish I make an exception. 


Ingredients:
§     2 cans of Mexicorn, drained
§     1 1/2 teaspoons Accent
§     8 ounces sour cream
§     1 cup Hellman’s Real Mayonnaise
§     15 ounces sharp cheddar cheese, grated and divided
§     1 small jar of pimentos, drained
§     4 – 5 green onions, chopped
§     1 chopped jalapeno pepper
§     1 teaspoon garlic powder
§     Kosher salt and pepper

Preheat oven to 350 degrees.  In a large bowl, mix together the Mexicorn, Accent, sour cream, mayonnaise, 12 ounces of grated cheddar cheese, pimentos, green onions, chopped jalapeno and garlic powder.
 
I like a little spice so I add all of the seeds in the jalapeno pepper.  If you don't enjoy the heat, add only a few of the seeds.
 
Season with salt and pepper to taste.
 
Spray a casserole baking dish with non-stick cooking spray and add corn mixture.
Bake approximately 20 - 30 minutes until hot and bubbly.
 
Remove from oven and sprinkle with remaining 3 ounces of shredded cheese.  The warmth of the dip will melt the cheese.
 
Serve with corn chips.  For a printer friendly copy of this recipe, go to Hot Corn Dip.  Enjoy!

Sunday, July 14, 2013

Warm Potato Salad

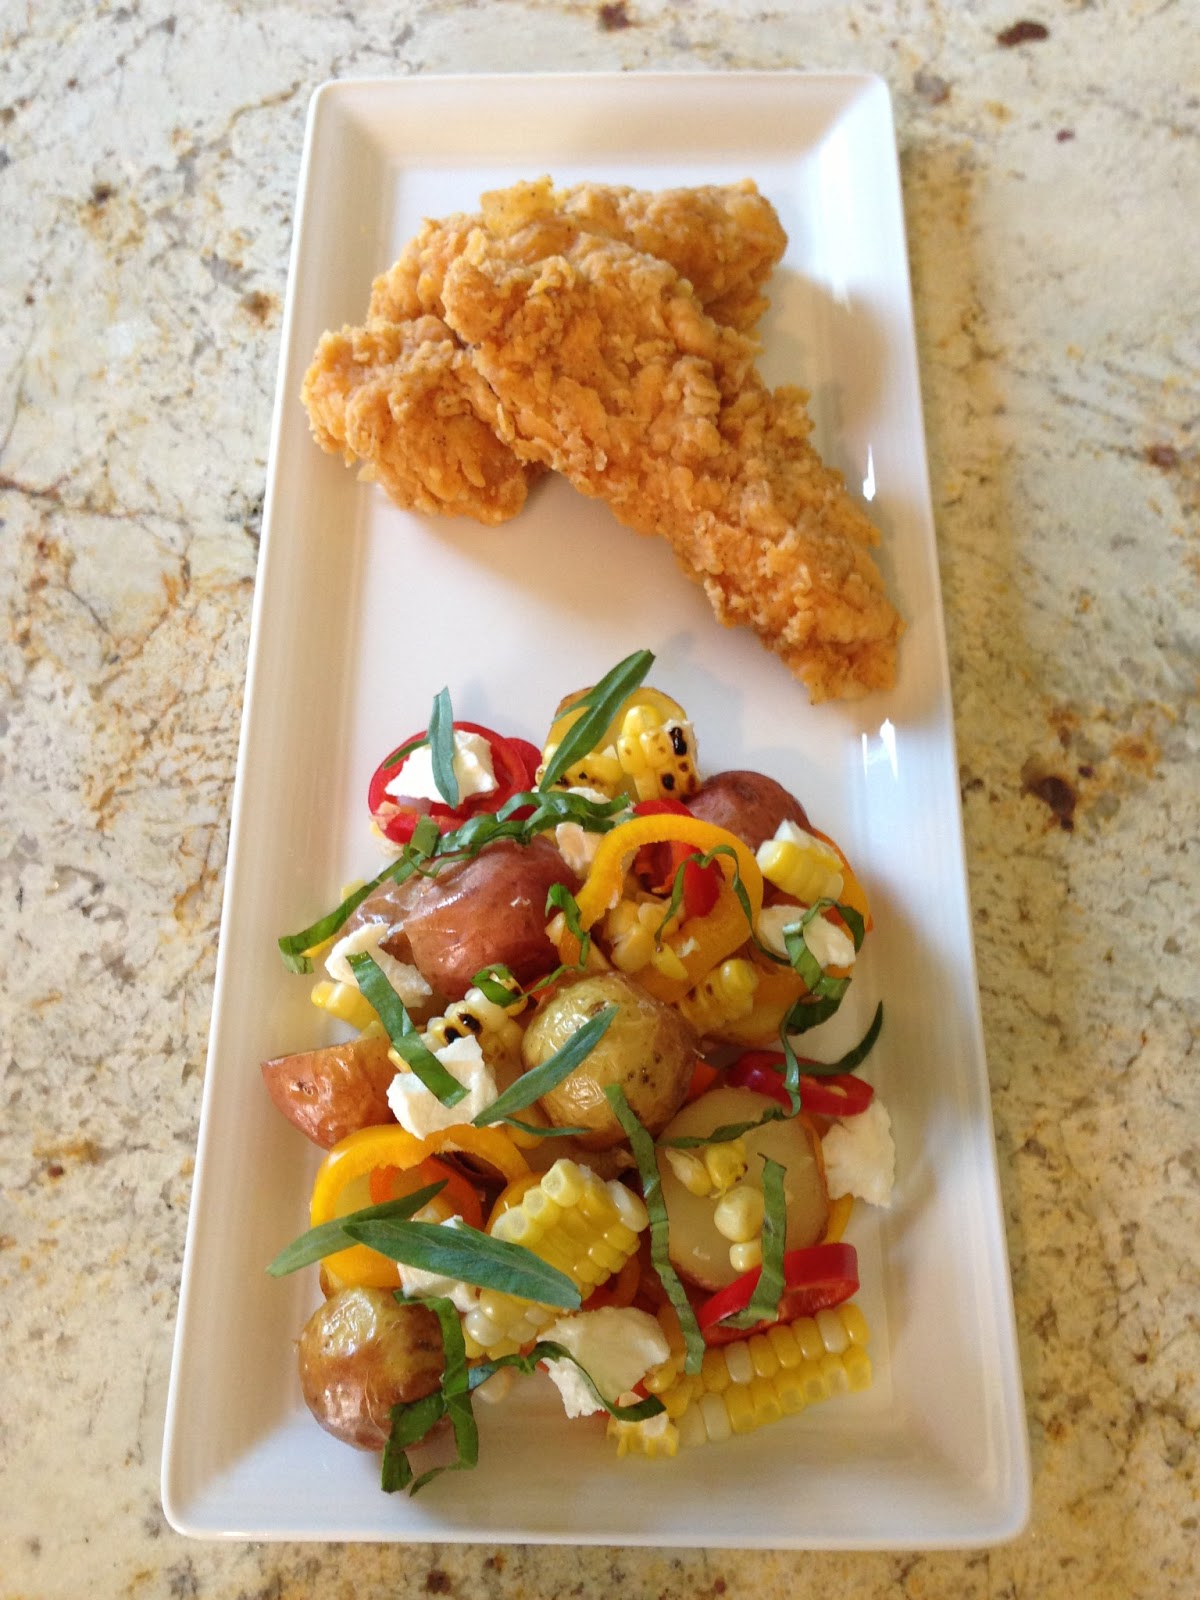
I recently wrote the recipe for Warm Potato Salad because it fits well with my summer entertaining menus.  It's served warm or at room temperature so we can eat it on the back patio or on the boat.  It keeps for hours but never lasts that long.  It uses fresh seasonal ingredients which I always have on hand and takes just a few minutes to prepare. 
I’ll share with you a little secret.  I sometimes make a lot more than I need so I have leftovers because it’s so easy to warm up.  All I do is pick out the potatoes, warm them in the microwave and add them back to the salad. 
 
This dish is so versatile I occasionally add grilled shrimp or substitute pasta for the potatoes.  


In order to give you a recipe I had to give you measurements for each ingredient, but use what you have and more .  I typically buy small yellow, red and orange peppers, so that’s what I use. 


If you have a large red pepper…go ahead and use that.  I love the small new potatoes and I always have them on hand, so that's what I use, but if all you have are large potatoes, cut them into 1” squares.  Grace doesn’t like raw onions, so I don’t add them, but if I was making it for myself, I would thinly slice a red onion into the salad.  We all love goat cheese, so I use it frequently, but if you don’t, substitute feta or cheddar.  I’ve given you my recipe which has the ingredients we like to eat.  Create your own family recipe with your favorite ingredients.

Ingredients:
§     1 bag (1 ½ pound) of small yellow potatoes
§     1 bag (1 ½ pound) of small red potatoes
§     1 cup small red, yellow and orange peppers, sliced
§     2 – 3 ears fresh corn
§     6 - 8 basil leaves, chiffonade
§     1/4 – 1/2 cup fresh goat cheese
§     1 small lemon
§     olive oil
§     kosher salt and pepper

Preheat oven to 350 degrees.  Place small potatoes on a sheet pan.  Drizzle with olive oil and salt and bake approximately 20 – 30 minutes until potatoes are soft.  The length of time will vary based upon the size of the potatoes.  While the potatoes are in the oven, prepare the vegetables.  Cook the corn by placing the fresh corn, husk and all, into the microwave.  For 3 ears of corn, cook in the microwave for 5 - 6 minutes depending on the size of the ears. 
Remove from the microwave, cut through the husk at the bottom of the corn and the clean ear should slide out of the husk.  I sometimes grill the cooked ears to char the corn and create another layer of flavor.  Slice the kernels off the cobs. 
Remove the potatoes from the oven and cut in half.  In a large bowl, add cooked potatoes, sliced peppers and corn. 

Add salt and pepper to taste and dress with olive oil and the juice of one small lemon.  Feel free to use your favorite bottled vinaigrette, if you prefer.  Place on serving platter and dot with marble sized pieces of goat cheese. 
Top with basil chiffonade.  To chiffonade the basil, stack the basil leaves in a neat pile so they are curling upward.  This makes them easier to roll.  Roll the basil leaves tightly like a cigar.  Using a sharp knife, slice the leaves into thin, evenly sized strips. 
For a printer friendly copy of this recipe, go to Warm Potato Salad. Enjoy!


Sunday, June 30, 2013

Dill Caper Sauce

Like ketchup, mustard and mayonnaise, I always have Dill Caper Sauce in my refrigerator.  It’s easy to make and keeps for months.  Actually, I don’t know how long it keeps because in my refrigerator it has never lasted long enough to go bad.


I’m embarrassed to admit that on occasion I choose what I’m going to eat by what would create the best conduit for this sauce.  I use the Dill Caper Sauce instead of tartar sauce and always have a bag of frozen fish filets ready to sauté in a pan.  Not because I love frozen fish filets.  I make them because they taste so good with my Dill Caper Sauce.  For this photograph, I dusted several shrimp with my dry rub and grilled them for 2 minutes on each side.  To get the recipe for my dry rub, go to my April 2012 Shrimp and Grits blog post.
 
Ingredients:
§     1 cup Hellmann’s Real Mayonnaise  (not low-fat or non-fat)
§     1/4 cup sweet pickle relish, rinsed and strained
§     1/4 cup dill pickle, finely chopped
§     1/4 cup capers, finely chopped
§     1 small onion, finely chopped
§     1 large garlic clove, finely chopped
§     Juice of 1/2 lemon
§     1/4 teaspoon cayenne pepper
§     Pinch of kosher salt
§     3 - 4 tablespoons fresh dill, chopped

In a small bowl, strain sweet pickle relish and discard juices.
 
In a medium size bowl, combine mayonnaise with the strained sweet pickle relish, dill pickle, capers, onion, garlic, lemon juice and cayenne pepper. 
Add salt to taste.  Mix in fresh dill.

Like many sauces, Dill Caper Sauce tastes better if you prepare it a day ahead and allow the flavors to develop.
 

For a printer friendly copy of this recipe, go to Dill Caper Sauce. Enjoy!

Sunday, June 16, 2013

Southern Tres Leches Cake

When I made the decision to include this recipe in my blog, I knew I had to change the name.  For years, I’ve been referring to this cake as The Cool Whip Cake.  Not a very romantic name for such a delicious dessert. 
This is the easiest cake I make and by far the most requested, so even though I’m embarrassed to admit that I start with a cake mix and end with Cool Whip, I decided to share the recipe with you…..but I refuse to continue to call it The Cool Whip Cake.  Then it came to me….the cake requires three different milks….so why not call it “Southern Tres Leches Cake.”  Brilliant!


To make this cake I use a boxed cake mix, but I never follow the directions on the box.  When making a yellow cake, I replace the required cup of water with a cup of milk.  When making a chocolate cake, I replace the water with 3/4 cup of coffee and 1/4 cup of milk.  Occasionally, I squirt in a few tablespoons of chocolate syrup.  I also add a 4th egg to the 3 the box requires.  A tablespoon of pure vanilla and pinch of salt make a difference in the finished product. These simple modifications produce a cake that no one believes began with a box.

Ingredients:
§  Yellow Cake Mix that requires oil as opposed to butter as an ingredient
§  4 eggs
§  1 cup milk
§  1/3 cup oil
§  1 tablespoon pure vanilla
§  1/2 teaspoon salt
§  1 can sweetened condensed milk
§  1 container Cool Whip, completely defrosted

Optional Topping:
§  1 cup coconut

Preheat oven to 350 degrees.  Prepare a 9 x 13 baking pan by spraying with non-stick cooking spray.
In a large bowl, mix together eggs, milk, oil, vanilla and salt. 
Add the cake mix and beat at medium speed for 2 minutes. 
Pour the batter into the prepared pan and bake for approximately 25 minutes or until a toothpick inserted in the center comes out clean.
Remove from oven and using a fork, prick holes into the cake while still warm. 
Slowly pour the sweetened condensed milk over the cake so it is absorbed and seeps into the fork holes.
Once the cake is completely cooled frost with Cool Whip.
If you like, top the Cool Whip with coconut.  Refrigerate until ready to serve.
This cake will taste better on day two and will last a surprisingly long time in the refrigerator.  For a printer friendly copy of this recipe, go to Southern Tres Leches Cake. Enjoy!

Sunday, June 2, 2013

Twice Baked Potatoes

It is a tradition of my extended Tennessee family to celebrate family birthdays together. For years we were eight adults and five children gathering at Grandma and Grandpa’s house for dinner or Sunday lunch. The dining room table could not accommodate all of the adults, and we never knew which adult would be asked to sit at the children’s table in the kitchen.  Over the years, we experienced some changes.  The children grew up, we lost Grandpa four years ago and Grandma grew frail. With our growing number of family members now including spouses, boyfriends and girlfriends, each parent sibling would host the ever growing family event in their own home.  We recently hosted over 20 people for Mother’s Day lunch at our home when I noticed that I had made Twice Baked Potatoes each of the last three times we  hosted.
   
I chose this side item because I can make it the night before and heat it in the oven before my guests arrive.  With summer approaching, I thought I would share this simple recipe that is a welcomed addition to any dinner or cookout.  We lost the matriarch of my extended Tennessee family just a few short days following Mother’s Day.  She will be  missed.

Ingredients:
§  4 large russet potatoes
§  4 - 8 tablespoons butter
§  1/2 cup sour cream
§  4 tablespoons chives, finely chopped
§  1/2 cup shredded sharp cheddar cheese
§  Kosher salt and freshly ground black pepper to taste

Optional Toppings:
§  Bacon
§  Chopped tomatoes
§  Salsa

Preheat the oven to 400 degrees. Wash the potatoes with a soft brush or clean scouring sponge.  Do not wrap the potatoes in aluminum foil as you typically would to make baked potatoes as it will keep the skins soft.  We want the skin to be firm to provide a vessel strong enough to hold the filling securely.
 
Set the potatoes on a baking sheet, place in the center of the oven and bake for 30 minutes. For even and thorough baking, pierce each potato several times with a fork and continue to bake until tender, about 30 minutes longer. Remove potatoes from the oven, and turn the heat down to 375 degrees.
 
While the potatoes are still warm, cut in half lengthwise.  Using a spoon, carefully scoop out most of the potato into a bowl. Take care to leave enough potato in the skin so the shells hold together.
  
Mash the potatoes lightly with fork.  Add butter and sour cream.  Stir in scallions, shredded cheese and season with salt and pepper.  If you like, you can add bacon to the potato mixture.  I find that when I add bacon to the mixture, all I taste is the bacon so I prefer to sprinkle with chopped bacon before serving.

Season the empty potato shells with salt and pepper and sprinkle with a teaspoon of grated cheese.  Refill with the potato mixture mounding it slightly.
  
You may not have enough filling to refill all of the potatoes, but if you mound the mixture, most people will only eat a single half.  I top my potatoes with cheese after they come out of the oven.  If you top the potatoes with cheese before returning them to the oven, the cheese will harden and form a crust.  I prefer my cheese soft and gooey.
  

If you are not planning to eat the potatoes immediately, cover with plastic wrap and place into the refrigerator until ready to reheat.  When ready to serve, set the potatoes back onto a baking sheet and bake until heated through, about 20 minutes.


Remove from oven and sprinkle the cheese while still hot.  You may want to keep them in the over for a minute or two until the cheese is thoroughly melted.  If you like, top the warm potatoes with chopped tomatoes and bacon.  Serve immediately.  For a printer friendly copy of this recipe, go to Twice Baked Potatoes. Enjoy!