Sunday, January 13, 2013

Sweet and Savory Baked Beans

Today we’re celebrating the 90th birthday of Frances Oliver, the matriarch of the family who took me in as one of their own almost 20 years ago when I moved to Nashville. We are honored to host her birthday celebration in our home. When asked what she would like on the menu, she didn’t hesitate for a minute before listing all of her favorites; Tennessee Barbecue, Potato Salad, Cole Slaw, Baked Beans and Corn Casserole.  

Where I grew up, we had the best pizza places on every street corner so I never felt the need to make homemade pizza.  That’s how I feel about barbecue in Tennessee.  In Nashville there are so many award winning barbecue restaurants, I see no reason to compete, so I’ll spend my time making the sides. 

Miss Frances requested buns, but I may surprise her with homemade hoe cakes, corn bread fried like pancakes. According to early American food history, hoe cakes are so-called because they were baked on the blade of a gardening hoe by slaves in the fields. 

This is the second time this week that someone has asked me to make my Sweet and Savory Baked Beans, so I thought I would share that recipe with you.


Ingredients:
§     1 onion, finely chopped
§     1 red pepper (or a combination of red, yellow and orange), finely chopped
§     2 tablespoons vegetable oil
§     2 28 ounce cans of beans (vegetarian or pork and beans)
§     1/4 cup maple syrup
§     1/4 cup light brown sugar
§     1/4 cup ketchup
§     3 tablespoons yellow mustard
§     1 tablespoon lemon juice
§     1 teaspoon salt
§     1/2 teaspoon pepper


Preheat oven to 350 degrees.  Heat vegetable oil in a frying pan and add finely chopped onions.  Sauté the onions until translucent but not brown and then add the chopped peppers. 


Sauté the peppers and onions for one or two minutes and remove from the flame. 


In a large bowl, mix together the beans, maple syrup, brown sugar, ketchup, mustard, lemon juice, salt and pepper.  


Add the onion and pepper mixture and combine well. 


Pour into a casserole dish and bake uncovered for approximately 30 - 40 minutes until the mixture bubbles and thickens slightly.  For a printer friendly copy of this recipe, go to Sweet and Savory Baked Beans. Enjoy!

Sunday, December 30, 2012

Smoked Salmon Mousse

The refrigerator is free from holiday leftovers and the house is clean.  There is no sign of holidays past and I just got a call from dear friends who want to stop by to deliver holiday gifts.  I had no idea I would be entertaining this evening nor am I prepared for company, but after a quick scan of my pantry and refrigerator, I know I can turn to an old faithful. 

My friend Ilene gave this recipe for Smoked Salmon Mousse to me 30 years ago and I still turn to it when I need a quick hors d’oeuvre or addition to my brunch buffet. I still can't figure out why it's called Smoked Salmon Mousse.  It's not made with smoked salmon and it's not a mousse, but who am I to rename someone else's recipe.  Since it tastes best served at room temperature, it makes a good contribution to a 'pot luck' New Year's Eve party or you may want to have it on hand if you are expecting guests over the holiday weekend.  Wishing you all a very Happy New Year!


Ingredients:
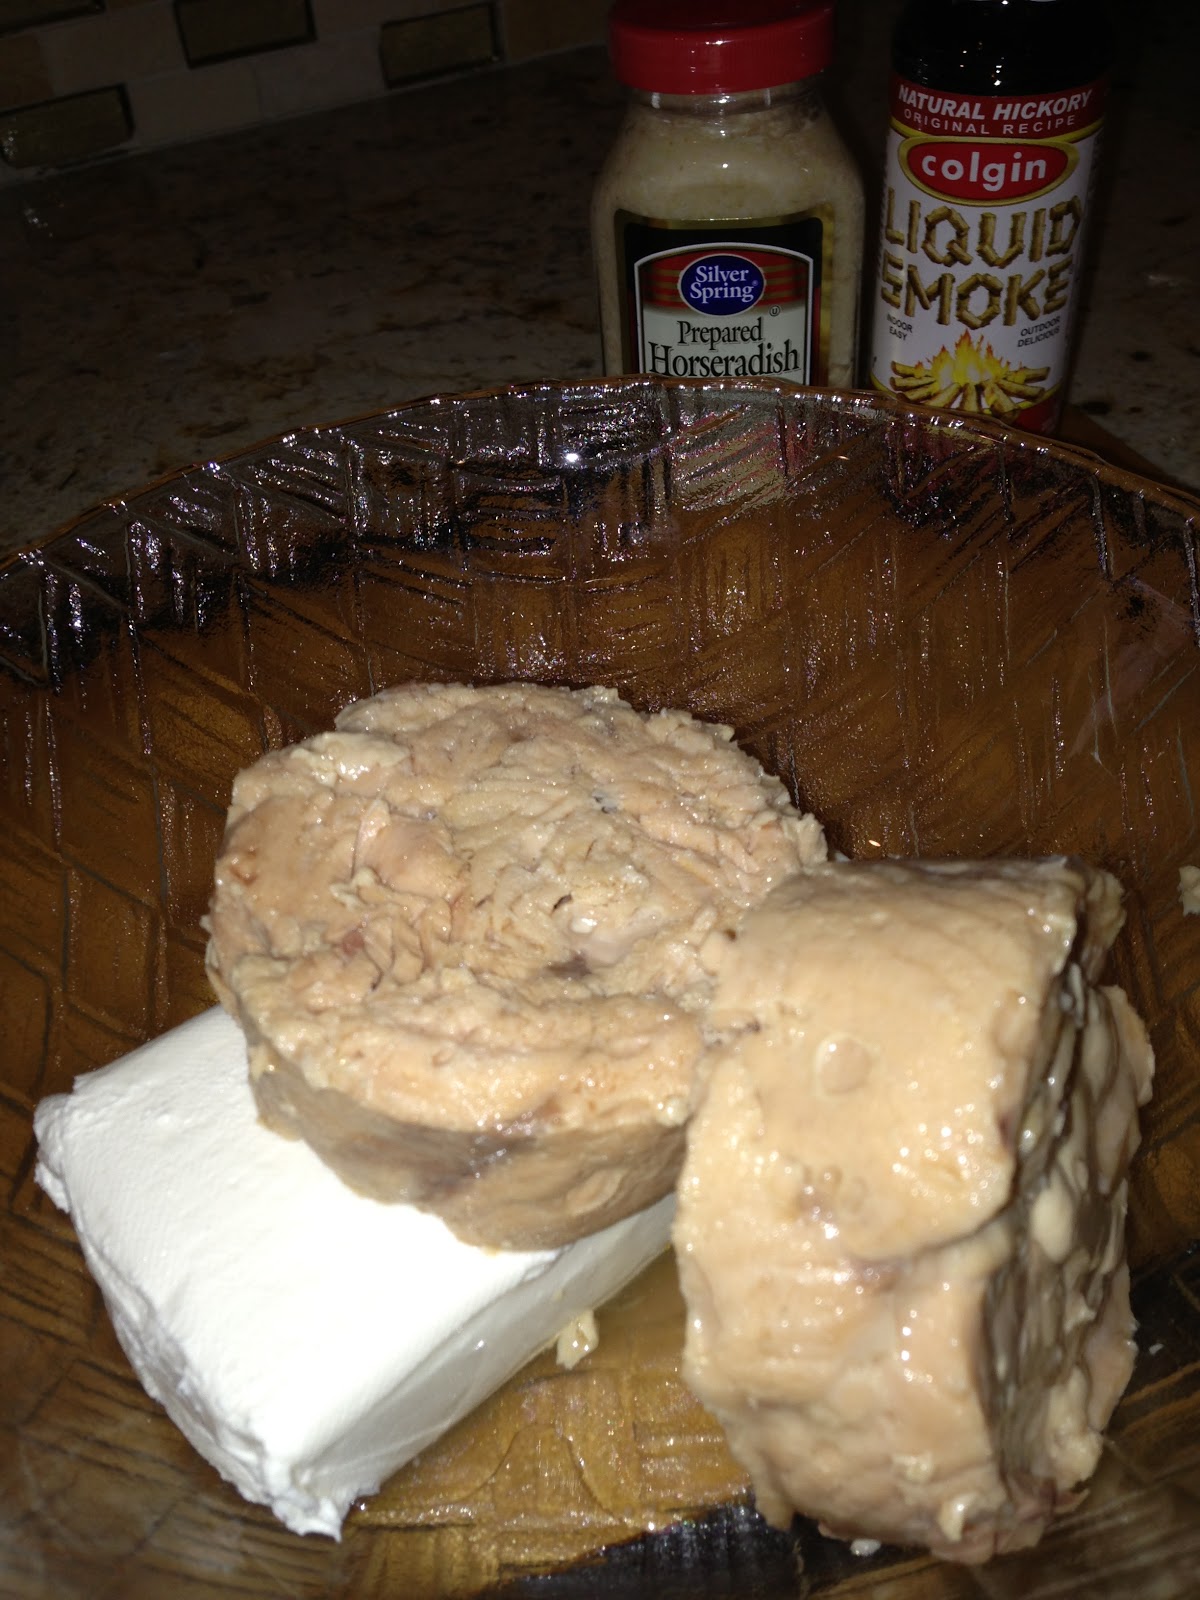
§     2 6 or 7 ounce cans of skinless and boneless salmon
§     1 8-ounce package of cream cheese
§     1 tablespoon lemon juice
§     2 teaspoons finely chopped onion (optional)
§     1 teaspoon prepared horseradish
§     1/4 teaspoon salt
§     1/2 teaspoon liquid smoke


In a medium sized bowl, mix all ingredients and serve with crackers. 
If possible, I prefer to make this at least a day ahead so the flavors have time to meld, but last minute, this will still be a hit.  For a hors d’oeuvre, I sometimes fill hollowed out cherry tomatoes with this smoked salmon mousse to create an “Amuse Bouch,” a single bite to delight while enjoying a cocktail before a meal, but I most often serve this in a bowl surrounded by crackers. 
If I have some left over, I eat it for breakfast/brunch spread on a toasted bagel topped with a slice of tomato, chopped onion and capers. 
For a printer friendly copy of this recipe, go to Smoked Salmon Mousse. Enjoy!

Sunday, December 16, 2012

Chicken Matzo Ball Soup

When Mama Marko comes to visit, we always make it a priority to spend bonding time in the kitchen….but it’s not always my kitchen.  My dear friends, Honey and Tina occasionally make a special request that this dynamic cooking duo come to their home and make Chicken Matzo Ball Soup.  


During my mother’s recent Thanksgiving visit we were able to accommodate our friends’ request.  We packed the car with my oversized stock pots and knives and drove to Franklin to make a huge pot of Jewish Penicillin.  By the end of the day, they had a counter lined with portion sized containers to fill their freezer and hopefully last them through the winter.

Ingredients:
§     1 whole chicken approximately 3 1/2 pounds
§     1 pound short ribs (optional)
§     4 large carrots
§     4 celery stalks
§     1 whole onion
§     4 celery stalks
§     Salt and pepper to taste
§     1 Small bunch of fresh parsley
§     1 Small bunch of fresh dill
§     1 bag of egg noodles (optional)


In a large stockpot, place the whole chicken.  To add more flavor, I typically add the neck bone, but don’t add the liver, it will make the soup bitter.  My mother always added short ribs to her chicken soup.  Back then, short ribs were not as trendy as they are today…and we called it “flanken,” but this meat added another layer of flavor to her special soup.  Add the short ribs (optional) and pour in enough water making sure the chicken and meat are covered by at least an inch or two. 

Cook over medium heat until the soup comes to a slow boil.  Lower the heat to medium low and simmer for approximately 1 hour.  If you allow the broth to boil hard, the soup will become cloudy.  After 1 hour, there will be impurities that rise to the surface.  With a slotted spoon, skim the impurities into a small bowl and toss.  Add water if necessary to keep the chicken completely covered. 


I like to add my vegetables after cleaning the impurities from the soup.  Once the broth is cleaned, add the whole carrots, celery stalks, parsley and whole onion.  At this time I add salt to the broth.  I begin with about a teaspoon or two, depending upon how large a pot you have. 


Cover and cook on medium low heat for approximately another hour.   While the broth is cooking, prepare the noodles and matzo balls. 

In a separate pot of boiling water, cook the egg noodles according to directions on the package.  Drain and set aside. 

For the matzo balls, I prefer to use a matzo ball mix.  It tastes exactly the same as using matzo meal and adding the additional ingredients, and I find that it is easier and readily available.

Ingredients:
§     1 package Matzo Ball Mix
§     2 eggs
§     1/4 cup vegetable oil
§     1 bouillon cube (optional)
§     1/2 teaspoon salt


Break 2 eggs into a medium bowl.  Add the vegetable oil and mix gently with a fork.  Do not whip.  Add the contents of one bag of the matzo ball mix and gently mix.  Cover with a piece of plastic wrap and place in the refrigerator for at least 30 minutes making sure the plastic wrap is touching the mixture to prevent the batter from forming a crust. 

In a large pot with a tight-fitting lid, bring 3 quarts of water to a boil with 2 teaspoons salt and a bouillon cube.  To add another layer of flavor to the matzo balls, I like to season the water so feel free to add an additional bouillon cube or other available chicken enhanced flavor packet. 


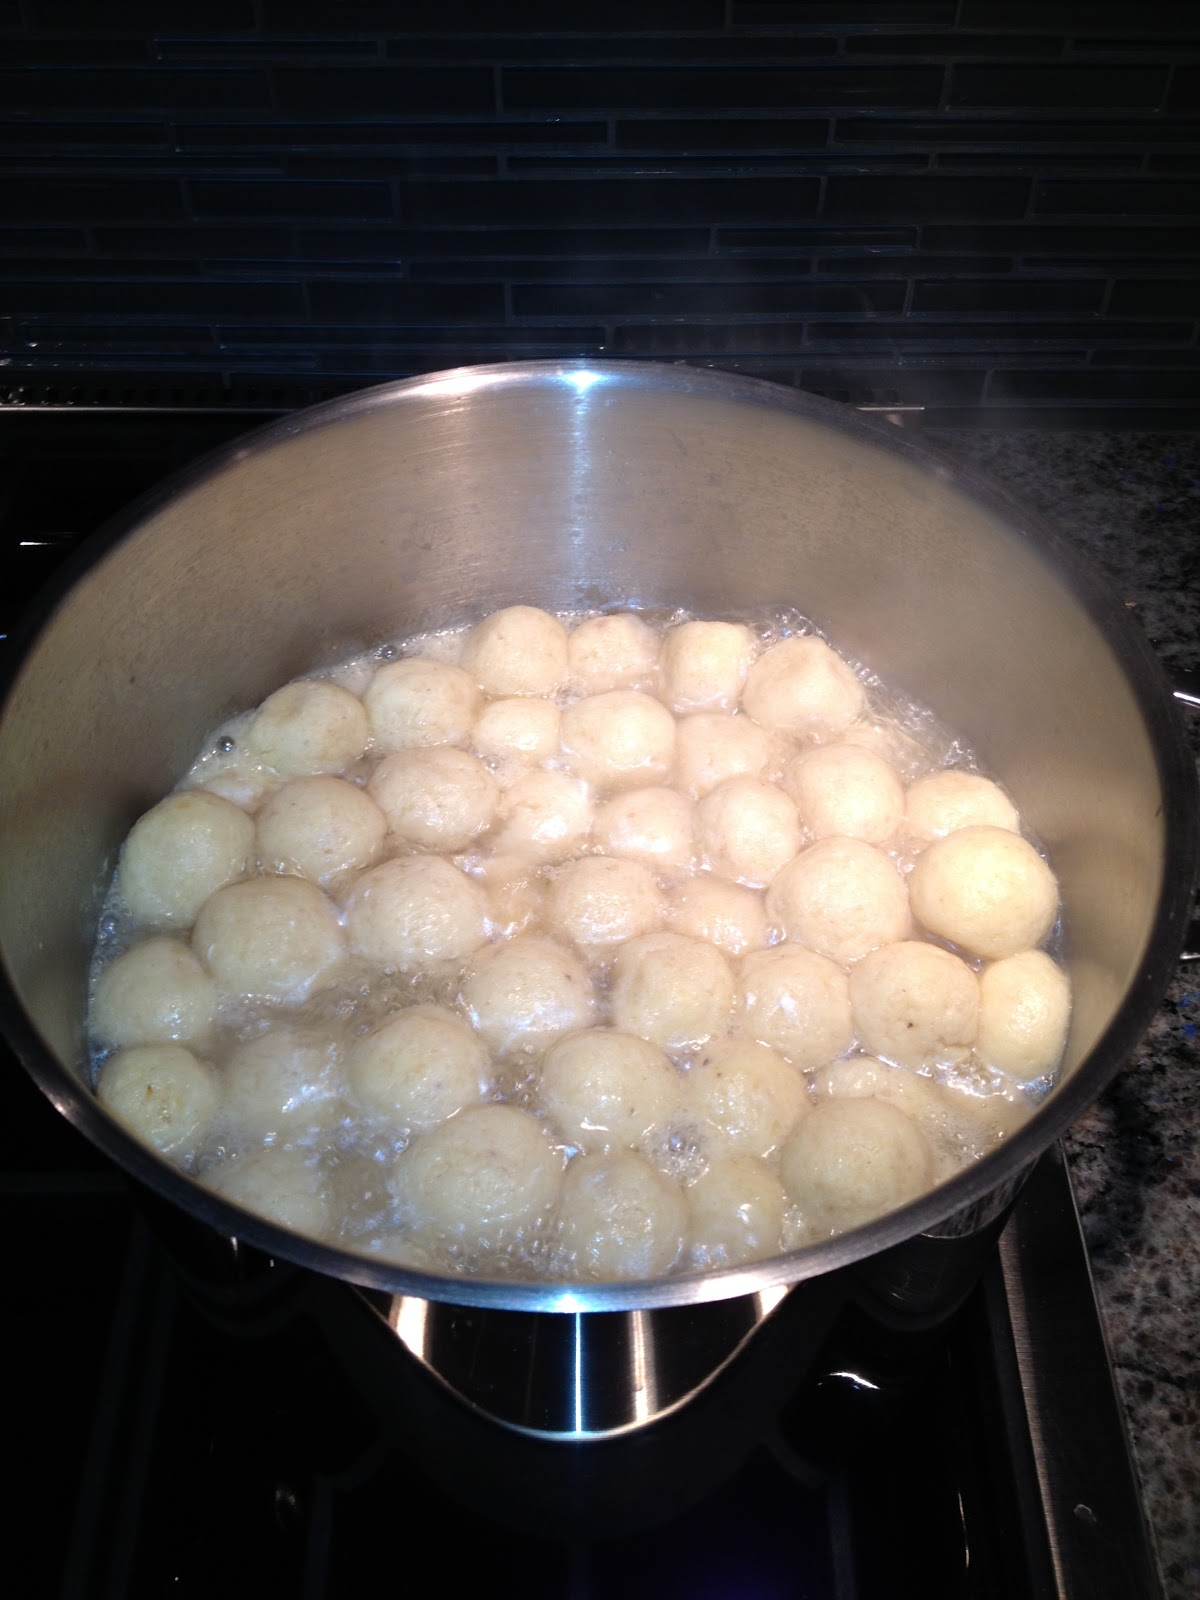
Using wet hands, form small balls from the matzo meal batter, each about the size of a grape or walnut, depending on the size of matzo balls you prefer.  Mama Marko is using a small ice cream scoop to keep them small and consistent in size.  Matzo balls swell as they absorb the water in which they are cooking.  Once the water boils, reduce heat and bring to a simmer.  Add the matzo balls, cover the pot and cook for 30 to 35 minutes. 


When chicken is done, carefully remove the chicken, short ribs and vegetables to a cutting board.  When cool enough to handle, discard the skin and bones and shred the meat into portion size pieces.  Discard the whole onion and cut the carrots and celery into serving size pieces.  Carefully strain the stock through a sieve into another pot. 


To serve the soup immediately, place a few pieces of chicken, meat, carrots and celery into a bowl.  Add noodles and several matzo balls and cover with broth.  Top with a sprig of fresh dill or a teaspoon of finely chopped dill. 


If you have leftover broth, freeze in containers.  The next time you need chicken broth for a recipe, you now have homemade stock.  For a printer friendly copy of this recipe, go to Chicken Matzo Ball Soup. Enjoy!

Sunday, December 2, 2012

Corn Soufflé

When I posted the recipe for the Praline Sweet Potatoes I make for Thanksgiving, I happened to mention that I also make Corn Soufflé. 


I must have gotten at least 30 emails requesting the recipe for the Corn Soufflé.  I actually have two recipes.  Both are easy but one requires cutting the corn from the cob, which means you have to plan ahead to make sure you have fresh corn.  The second contains ingredients you probably have in your pantry.  I replied to each request by forwarding both recipes.  Each person who responded telling me how much they enjoyed the dish told me they made the one containing the canned corn, so that is the one I will share with you today.

Ingredients
§     2 (15.25 ounces) cans whole kernel corn (drained)
§     2 (15.25 ounces) cans creamed corn
§     1/4 cup sugar
§     1/4 cup all-purpose flour
§     1/4 cup whole milk
§     4 eggs, room temperature
§     1/2 teaspoon salt
§     2 tablespoons butter


Preheat oven to 350 degrees.  Prepare your casserole dish by spraying with non-stick cooking spray to keep the soufflé from sticking, and spread the softened butter onto the bottom and sides of the baking dish to add flavor.


In a small bowl, combine the sugar, flour and salt.  In a large bowl combine the eggs and milk and beat lightly.  Add the dry mixture to the egg and milk mixture while whisking to prevent lumps. 


Add the whole kernel corn  (drained) and creamed corn and mix well. 


Pour the mixture into the prepared casserole dish.  Bake at 350 degrees for 1 hour or until set. 


For a printer friendly copy of this recipe, go to Corn Soufflé. Enjoy!

Sunday, November 4, 2012

Creamy Tomato Soup

I have a great respect for mothers….and some fathers….who prepare 3 meals a day, 7 days a week. I believe one of the reasons I love to cook is because I cook when I am the mood to, not when I have to.  We recently hosted guests for a 4 night, long weekend, and although I love their company, even I considered take out, something I’ve never done before.
I don’t have to bring restaurant prepared food home because my freezer is well packed with food I’ve made in advance to provide home cooked meals on demand.
  
I am one of those cooks who rarely follows a recipe.  With the exception of baking, I read cookbooks and watch the food network for inspiration.  The problem with that is inconsistency.  So when I get ready to post one of my recipes to the blog, I write down every time I add something to the pot and compile the exact recipe at the computer.  Today I’m making tomato soup.  This huge pot of soup will provide dinner for tonight, but most of it will end up in smaller containers in my freezer for future meals. If you are not interested in freezing leftovers, feel free to cut the recipe in half.
Ingredients
§     1 large onion, diced
§     4 tablespoons unsalted butter
§     4 tablespoons flour
§     3 cloves garlic, finely chopped
§     8 cups of broth, I use 2 (32 ounce) containers chicken or vegetable stock
§     4 28 ounce cans of tomatoes
§     4 tablespoons tomato paste
§     6 sprigs of fresh thyme
§     2 tablespoons sugar
§     1 cup of white wine
§     2 cups heavy cream
§     Salt and pepper to taste
Optional Soup Garnishes
§     Toasted garlic croutons
§     Fresh basil leaves chiffonade (To chiffonade basil leaves, stack the leaves, roll into a tight bundle and cut into thin slices.) 
§     Fresh thyme leaves
§     Spoonful of pesto and pine nuts
In a large soup pot over medium-high heat, melt the butter.  Add the chopped onions and sauté, stirring occasionally until soft and translucent.  Add the chopped garlic.  Stir in flour and cook, stirring for about 2 – 3 minutes to cook out the raw taste of the flour but not long enough to brown the flour. 
Pour in 4 cups of broth and whisk constantly until the soup begins to thicken. 
Add the remaining broth, cans of tomatoes, tomato paste, wine, sugar, salt and pepper. I always add a little sugar to foods containing a lot of tomatoes.  I find that it cuts the acidity and tastes better…not to mention it eliminates my need for antacids afterwards.
Tie the sprigs of thyme together with a piece of kitchen twine and add to the pot.  Bring to boil, while stirring occasionally, and reduce the heat and simmer for approximately 30 minutes.  Remove and discard the thyme bundle.  Most of the thyme leaves should have fallen off the sprigs. 
If you have an emersion blender, my favorite kitchen appliance, puree until smooth. 
If you don’t have an emersion blender, cool the soup slightly and working in batches transfer the soup to a blender and puree until smooth.  Return the puree to the pot and reheat over medium heat.
Whisk in the heavy cream and season with salt and pepper to taste.  For a printer friendly copy of this recipe, go to Creamy Tomato Soup. Enjoy!
 

Freezing Tip:

Before freezing, make sure the soup is cool.  I have placed warm soup in the freezer only to find a mountain like hump in the center when it freezes.  I actually keep it in the refrigerator overnight before freezing.  Although that’s not required, I find that the soup freezes more evenly when it is not just cooled, but chilled.
I recommend using hard plastic or glass containers to freeze anything made with tomatoes as they do not discolor.  If you are freezing in a hard plastic container or glass jar, do not place the cover over the soup after filling. Place the uncovered container in the freezer.  As with anything, while the soup freezes, it will expand. If you cover the container, it may break. If you wait until after the soup has frozen and expanded to replace the cover, your container is safe in the freezer.  This process allows you to freeze the soup in attractive containers perfect for gifting.


Sunday, October 21, 2012

White Chocolate Bark

If you are a Facebook friend of mine, you already know that we had a fire in our home last week. Gratefully, no one was hurt and nothing was lost….just a lot of smoke and soot damage.  For the past 10 days, there have been many people traipsing through our home, cleaning walls, ceilings, furniture, carpets and drapes.  They took all of our clothes to have them dry cleaned, along with every rug, pillow, bedspread and tablecloth we own.  With all of this going on, you can be sure that the furthest thing from my mind was cooking anything.  But I made a promise to post a recipe every 2 weeks, and I’m committed to keeping that promise.  So I inventoried my pantry at 10:00am and was nibbling on these delicious treats at 10:30am.  It doesn’t get easier than that.

Ingredients:
§     2 pounds white chocolate, finely chopped
§     1 cup almonds, slivered or sliced
§     1 cup dried cranberries
§     1/2 cup chopped pecans

Optional Toppings
§     Peppermint candy, finely chopped
§     Pretzels, roughly chopped
§     Mini M&M Candies
§     Walnuts
§     Raisins
§     Chocolate Chips

Line a cookie sheet with parchment paper, allowing the paper to hang over the sides.  Preheat oven to 350 degrees.  To toast the pecans, place them in a single layer on a sheet pan and bake for 5 minutes.  Remove from oven and set aside to cool.
Once the nuts are cooled, chop coarsely.  I prefer to use slivered or sliced almonds because they are ready to use, but today I only had whole almonds in my pantry, so I cut each almond into thirds.  I chopped them by hand because I like to recognize the almond on the bark.  If I run then through the food processor, they become powdery.  Chop the white chocolate and place into a glass bowl.  Melt the chocolate in the microwave, stirring with a rubber spatula every 30 seconds until smooth and creamy.  Depending on how finely you chopped the chocolate, this process should take between 1 - 3 minutes total.  
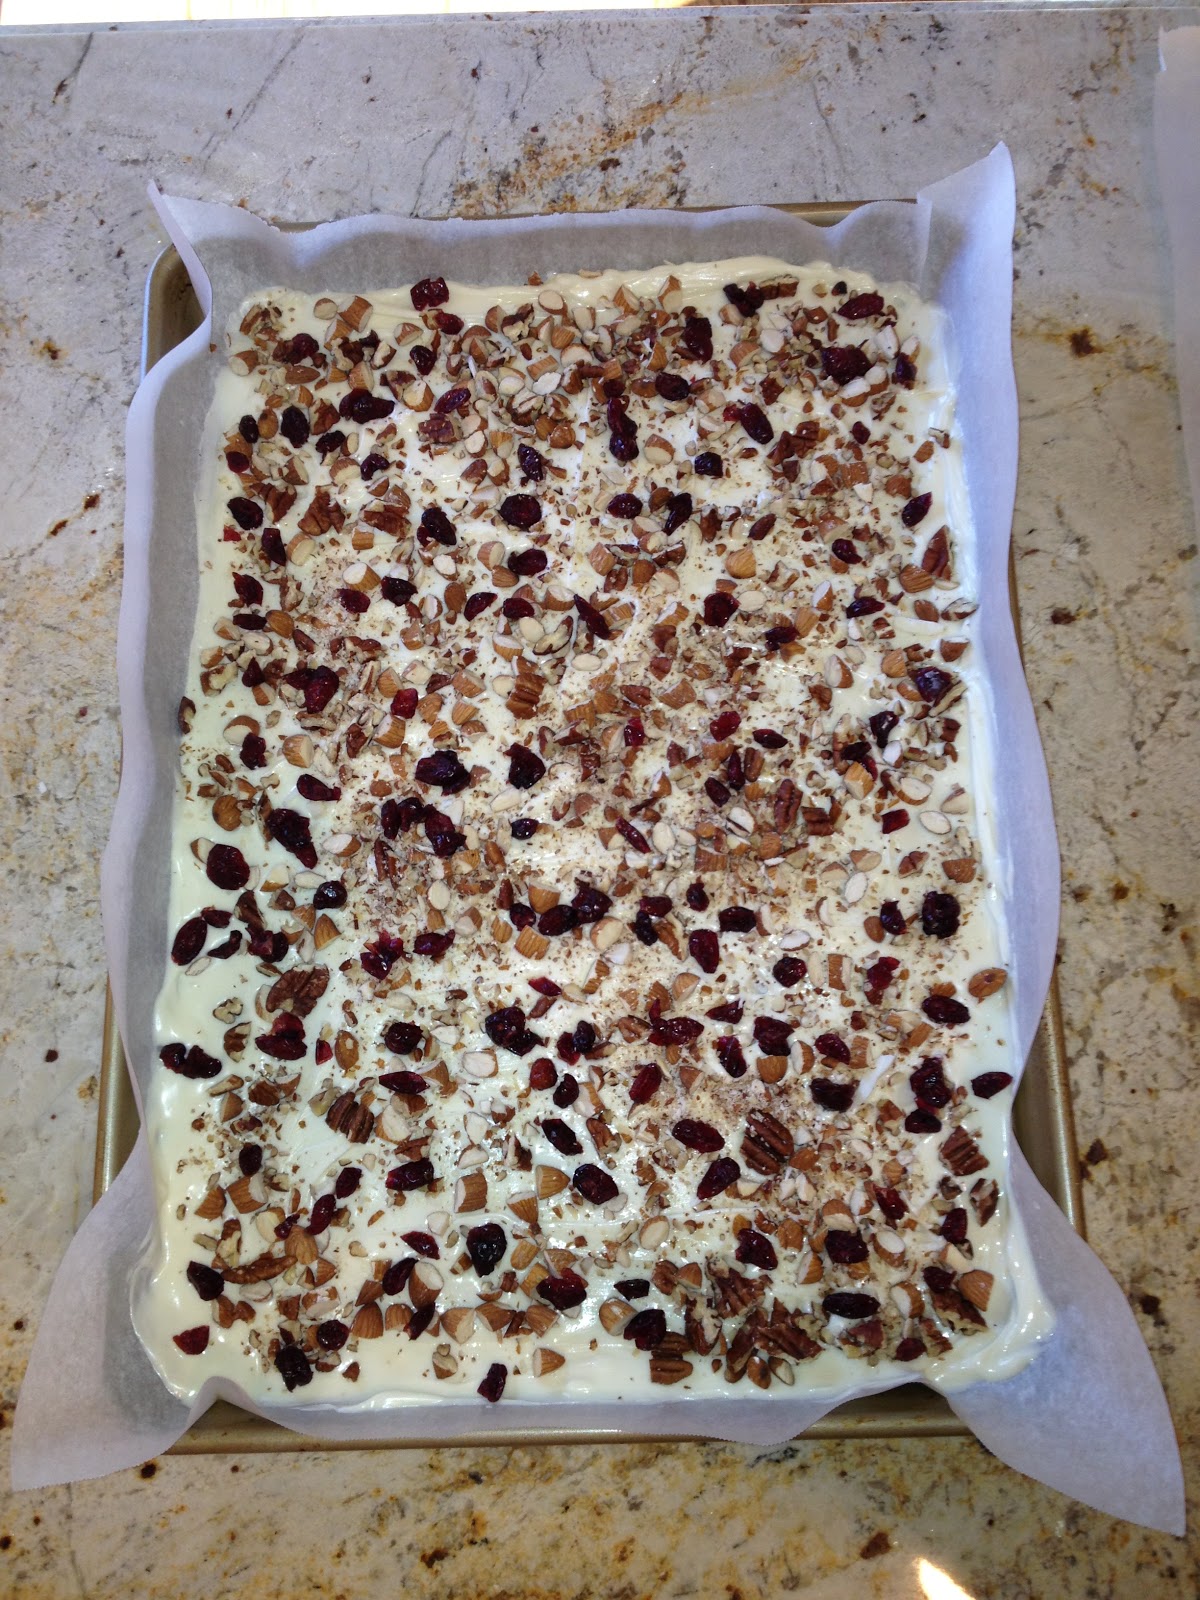
Pour the chocolate onto the prepared sheet and spread to cover the entire surface and form an even layer.  Sprinkle the top evenly with the nuts and cranberries.
Gently press the toppings into the melted chocolate.  Set aside to cool.  When firm, cut or break into small pieces.

Serve at room temperature. White Chocolate Bank stores well at room temperature in an air tight container.  For a printer friendly copy of this recipe, go to White Chocolate Bark. Enjoy!