Sunday, October 7, 2012

Black Bean and Corn Chili

For years I denied myself chili.  The reason is that the main spice ingredient in chili is cumin, a spice I’m not a fan of.  I love meat and I love beans so I felt deprived until one day I decided to create my own chili recipe where cumin was not the prominent flavor.  Yes, I know it wouldn’t…and shouldn’t….be called chili if it doesn’t have cumin, so I do include a little, but it’s definitely not the primary flavor. When I shared my unconventional chili with friends, I was thrilled to learn that others enjoyed it as much as I.  Actually, I wasn’t going to share my chili recipe because it continually changes depending on what I have on hand, but I've had four recent requests for the recipe so I guess this has become another of "My Most Requested Recipes." 
For this blog post I am documenting each and every time I add something to the pot so I will have an exact recipe, but feel free to alter the ingredients to accommodate your own taste.  I love beans, so I add a lot of them.  You can leave out 2 or 3 cans of beans.  I like my chili thick and hearty.  If you like a more soupy chili, add more broth or water.  You may want to add more heat, so add a tablespoon of Cayenne. 

I buy cans of beans when they are ‘buy one get one free’ at the market.  Today I happen to have Black Beans, Red Kidney Beans, Cannelloni Beans, Chili Beans, Northern Beans and Mixed Beans, so that’s what I’m including.  The types of beans I use changes, but I always include red kidney beans, black beans and yellow corn.  It just wouldn’t be my chili without them.  I typically add 1 large can of tomato sauce and 1 small can of tomato paste, but I don’t have tomato sauce in my pantry today so I’m adding a can of diced tomatoes which is not as rich as tomato sauce and 2 cans of tomato paste to make up for the richness.
Ingredients:
§     3 Tablespoons of oil, to coat the bottom of the pot
§     1 large onion, chopped
§     4 garlic cloves, finely chopped
§     3 lbs chopped beef
§     1 Tablespoon smoked paprika
§     2 Tablespoons chili powder
§     1 teaspoon cumin
§     1 teaspoon black pepper
§     2 Tablespoons Worcestershire Sauce
§     3 Tablespoons Ketchup
§     3 Tablespoons salt
§     3 Tablespoons brown sugar
§     1 Tablespoon red pepper flakes
§     1 28oz can stewed tomatoes
§     1 14.5oz can diced tomatoes
§     2 6oz cans tomato paste
§     1 16oz can beef stock
§     1 16oz can Black Beans
§     1 16oz can Red Kidney Beans
§     1 16oz can Chili Beans
§     1 16oz can Cannelloni Beans
§     1 16oz can Great Northern Beans
§     1 16oz can Mixed Beans
§     1 15.25oz can Yellow Corn
§     Salt and freshly ground pepper to taste

Add enough oil to coat the bottom of a large, heavy pot.  Heat oil over medium-high heat and add onions and garlic.  Sauté for about 6 – 8 minutes or until the onions are translucent. 

Add ground beef and cook until brown, breaking up the meat as it cooks.  Add the next 9 ingredients and stir to mix thoroughly. 

Stir in tomatoes, tomato paste and beef stock.  Drain and rinse the beans and corn and add to the Chili. Reduce heat and simmer for 1 hour stirring occasionally.  If the mixture looks dry, add water or additional beef stock.  Add salt and pepper to taste.  This dish can be made ahead and will probably taste better the next day. 
Although a bowl of this chili with a few corn chips for crunch is enough to satisfy any taste, below are additional serving suggestions:
§     Serve over rice
§     Top with cheddar cheese, sour cream and chopped green onion
§     Serve over pasta

Chili freezes very well.  I always make a huge pot and freeze it in 'dinner for two' portions.  My secret for freezing anything that has liquid is to place the container in the freezer and freeze the contents before replacing the lid.  This gives the food room to expand without cracking my container.  After the food is frozen and has expanded, I replace the cover.  Using this method, I am able to freeze foods that I have made as edible gifts in pretty jars. 
For a printer friendly copy of this recipe, go to Black Bean and Corn Chili. Enjoy!

Sunday, September 23, 2012

Cranberry-Pecan Cheese Crackers

Until now, each recipe I've posted to this blog was taken directly from the cookbook I've been writing for over 10 years. I wrote, tested and perfected each recipe, even those I inherited from my mother.  This recipe, however, was given to me by my friend, Loy, only last year.  When I started this blog, I promised to post "My Most Requested Recipes," so I would be remiss not to post this recipe for Cranberry-Pecan Cheese Crackers which is requested almost as much as my Candy Bacon.


I did try to perfect the recipe by changing some of the ingredients.  I tried raisins and walnuts with success but always returned to the original.  With the exception of changing a few measurements, this is the recipe given to me by Loy.
I serve these delicious crackers in so many ways.  When I prepare a cheese platter for a cocktail party, I always include a heaping pile on the platter.  A few crackers alongside a salad serve as a substitute for croutons.  These jeweled discs compliment any soup, but I especially like them with cream soups, tomato soup and my recently posted blog, pumpkin soup.  In the 'ber' months, (months ending in 'ber') I keep a cookie jar filled with these bejeweled crackers on the kitchen counter to provide an afternoon snack. 
For such a simple snack, they appeal to all of my senses.  The extra sharp Cheddar cheese provides the delicious taste.  The slight hint of heat from the cayenne lingers for several moments after you swallow the cracker.  The pecans offer a nutty crunch while the cranberries, which look like jewels, are sweet and chewy.

Ingredients:

§     1 1/2 cups chopped pecans
§     1 1/2 cups chopped sweetened dried cranberries
§     2 cups (4 sticks) unsalted butter, softened
§     1 1/2 teaspoon salt
§     1 1/2 teaspoons cayenne pepper
§     4 cups extra sharp Cheddar cheese, freshly shredded
§     4 cups all-purpose flour

Directions:


Toast pecans on a dry frying pan or single layer in a shallow pan in the oven until fragrant.  Be careful not to burn the pecans as they will become bitter.  Set aside until completely cooled.  Soak the cranberries in boiling water for about 15 minutes.  Drain, pat dry and cooI before adding them to the mixture.

In a bowl, beat softened butter, salt and cayenne pepper.  Add cheese and blend until creamy.  Gradually add flour mixing just until combined.

Stir in cranberries and pecans.  Divide the dough into 4 pieces and roll each piece to form a log approximately 2” in diameter.  Wrap the logs in plastic wrap and chill overnight. 

To bake the cheese crackers, preheat oven to 350°.


Remove the cheese logs from the refrigerator and cut into 1/4” discs.  Place the discs onto a baking pan lined with a Silpat or parchment paper. Bake 13 – 15 minutes or until lightly browned.  Remove from baking sheets and cool on wire rack.  Stored in an airtight container, these cheese wafers last for months.

For a printer friendly copy of this recipe, go to Cranberry-Pecan Cheese Crackers. Enjoy!

Sunday, September 9, 2012

Pumpkin Soup

Before moving to Nashville, I lived in Los Angeles for 9 years where the temperature rarely got below 70 or above 90 degrees.  There were no turning leaves nor brisk morning air.  The only way I knew it was fall was with the arrival of the first ‘ber’ month, (month ending in ‘ber').  September announced the beginning of the new season and gave me permission to prepare pumpkin, both sweet and savory. 
I must admit, to guarantee consistency I always use canned pumpkin, so I eat this savory soup all year long, but my friends seem to ask for it as soon as September, the first 'ber' month, arrives. 
Ingredients:
§     4 tablespoons (1/2 stick) butter
§     1 cup onion, finely chopped
§     2 garlic cloves, finely chopped
§     1/2 teaspoon red pepper flakes
§     2 quarts chicken broth
§     1 cup orzo
§     3 cups half and half or whole milk
§     2 tablespoons all-purpose flour
§     2 (15 ounce) cans pumpkin
§     Fresh thyme (optional)
§     Salt and freshly ground pepper

In large saucepan melt butter over medium-high heat.  Add onion and cook 3 to 5 minutes or until tender, stirring occasionally.  Stir in chopped garlic and crushed red pepper flakes and cook for 1 minute.  Add broth and bring to boil.  Add 1 teaspoon of salt and stir in orzo.  Reduce heat and simmer covered, about 15 minutes or until orzo is tender. 
 
In a small bowl, combine half and half (or whole milk) and flour and mix well.  Add to simmering soup.  Cook while stirring until slightly thickened and bubbly.  Stir in pumpkin.  Heat thoroughly.  Season with salt and pepper to taste.
To serve, sprinkle each serving with fresh thyme.
This soup takes less than 30 minutes to make and freezes well.  Eat it before your meal or as an accompaniment to a sandwich or salad.  For a printer friendly copy of this recipe, go to Pumpkin Soup. Enjoy!

Sunday, August 26, 2012

Basic Risotto

Several years ago I hosted three of my nieces for a weekend "Family Cooking Class."  Two of them were engaged to be married and the third was the reason for the event as she was the one who asked if I would teach her how to cook. Along with other of my favorites, I remember teaching them to make Tomato Soup, Homemade Pizza and Basic Risotto.   You might think this is an odd combination, but there was method to my madness. 

When teaching them to make tomato soup, they had to learn how to make a basic white sauce, the foundation for hundreds of recipes.  We had fun making individual pizza, but what I was teaching them was how to work with yeast, and with a Basic Risotto, your possibilities are endless.  

At the end of the weekend, I presented them with a basket of some of the odd ingredients, spices and seasonings we used as well as an electronic copy of the "Oliver Marko Family Cookbook" which I've been writing and continually updating for years.
 

Although it is simple to make, Risotto does require you  to devote 20 minutes of your undivided attention.  When cooking long grain rice, you are discouraged from stirring the rice while cooking because the starches will release and the rice will end up a sticky mess.  With Risotto, you want the starch to release which is what makes the dish creamy.  That is why we use starchy Arborio Rice and continuously stir during the cooking process.


Basic Risotto Ingredients: 


§ 1 medium onion, finely chopped
§ 3 tablespoons olive oil
§ 4 cloves of garlic, finely chopped
§ 1 cup Arborio rice
§ 4 cups chicken or vegetable stock
§ 1/2 cup dry white wine
§ 1/4 cup grated Parmesan Cheese
§ 3 tablespoons butter
§ 3 tablespoons Thyme, finely chopped
§ 3 tablespoons butter
§ Salt and Pepper to taste


In a medium saucepan bring the broth and 1/2 cup water to simmer.  Season with salt and pepper.  Cover the broth and keep hot over low heat. 


In a medium sized, heavy saucepan, melt 1 tablespoon of butter and 3 tablespoons olive oil over medium heat.  Add the onion and saute until tender but not brown, about 3 minutes. Season with salt and pepper.  Add the rice and chopped garlic and stir to coat with butter and olive oil.  Add the wine and stir continuously until mixture begins to simmer.

Add 1/2 cup of the simmering broth and stir until almost completely absorbed, about 2 minutes.  Continue cooking the rice adding 1/2 cup of broth at a time, stirring constantly and allowing each addition of the broth to absorb before adding the next, until the rice is tender but still and the mixture is creamy, about 20 minutes.  Remove from the heat and stir in the remaining 2 tablespoons of butter, 1/4 cup Parmesan cheese and fresh thyme. 

When plated, the Risotto should be saucy and spread in the bowl, not sit in the center of the plate like a scoop of mashed potatoes.  Now that you've made the Basic Risotto, your possibilities are endless

I happen to have a piece of grilled salmon left over from dinner last night.  To the salmon I added 1 cup of peas for the dish you see in the photograph.


Add any or a combination of the following to enhance your Basic Risotto:
§ 1/2 cup Pesto (select the name to access the recipe for Pesto)
§ Cubed butternut squash (cube, drizzle with olive oil and salt and bake until soft)
§ 1 cup cooked vegetables (i.e. asparagus, zucchini, broccoli or artichokes)
§ Sauteed mushrooms and thyme
§ 1 cup cooked chicken, shredded 
For a printer friendly copy of this recipe, go to Basic Risotto.  Enjoy!


Sunday, August 12, 2012

Pot Roast

When I moved away from home, it was difficult to get my mother to come visit.  She was always busy with something.  Then it occurred to me....I knew exactly how to get her here.  I told her how busy I was with my business and how much I would appreciate having some of the foods I grew up with in the freezer ready to pop into the oven after a busy day at work.  I told her we could work together in the kitchen to prepare some of my favorite of her dishes.  She was here within the week.  For the past 20 years, my mother will call before her quarterly visit to Nashville to ask, "What will we be making this time?"  I have always enjoyed cooking, but I mostly cherish the mother/daughter bonding time we've enjoyed over the years. 

My mother taught me how to make pot roast, and I still use her original recipe, with just a few minor changes, but I developed an unconventional cooking technique that even she was impressed with.

I grew up on pot roast made with brisket, but I prefer to use chuck. I find this inexpensive meat to be one of the most flavorful cuts of beef. A piece that is well marbled with fat will yield the best flavor, and simmering it slowly in the oven makes the beef incredibly tender.


One thing I’ve never liked about pot roast was the vegetables. After cooking for hours, they have infused their entire flavor into the meat and juices and no longer look nor taste appetizing. So I do something unconventional. I cook the pot roast with only half of the vegetables in the recipe.

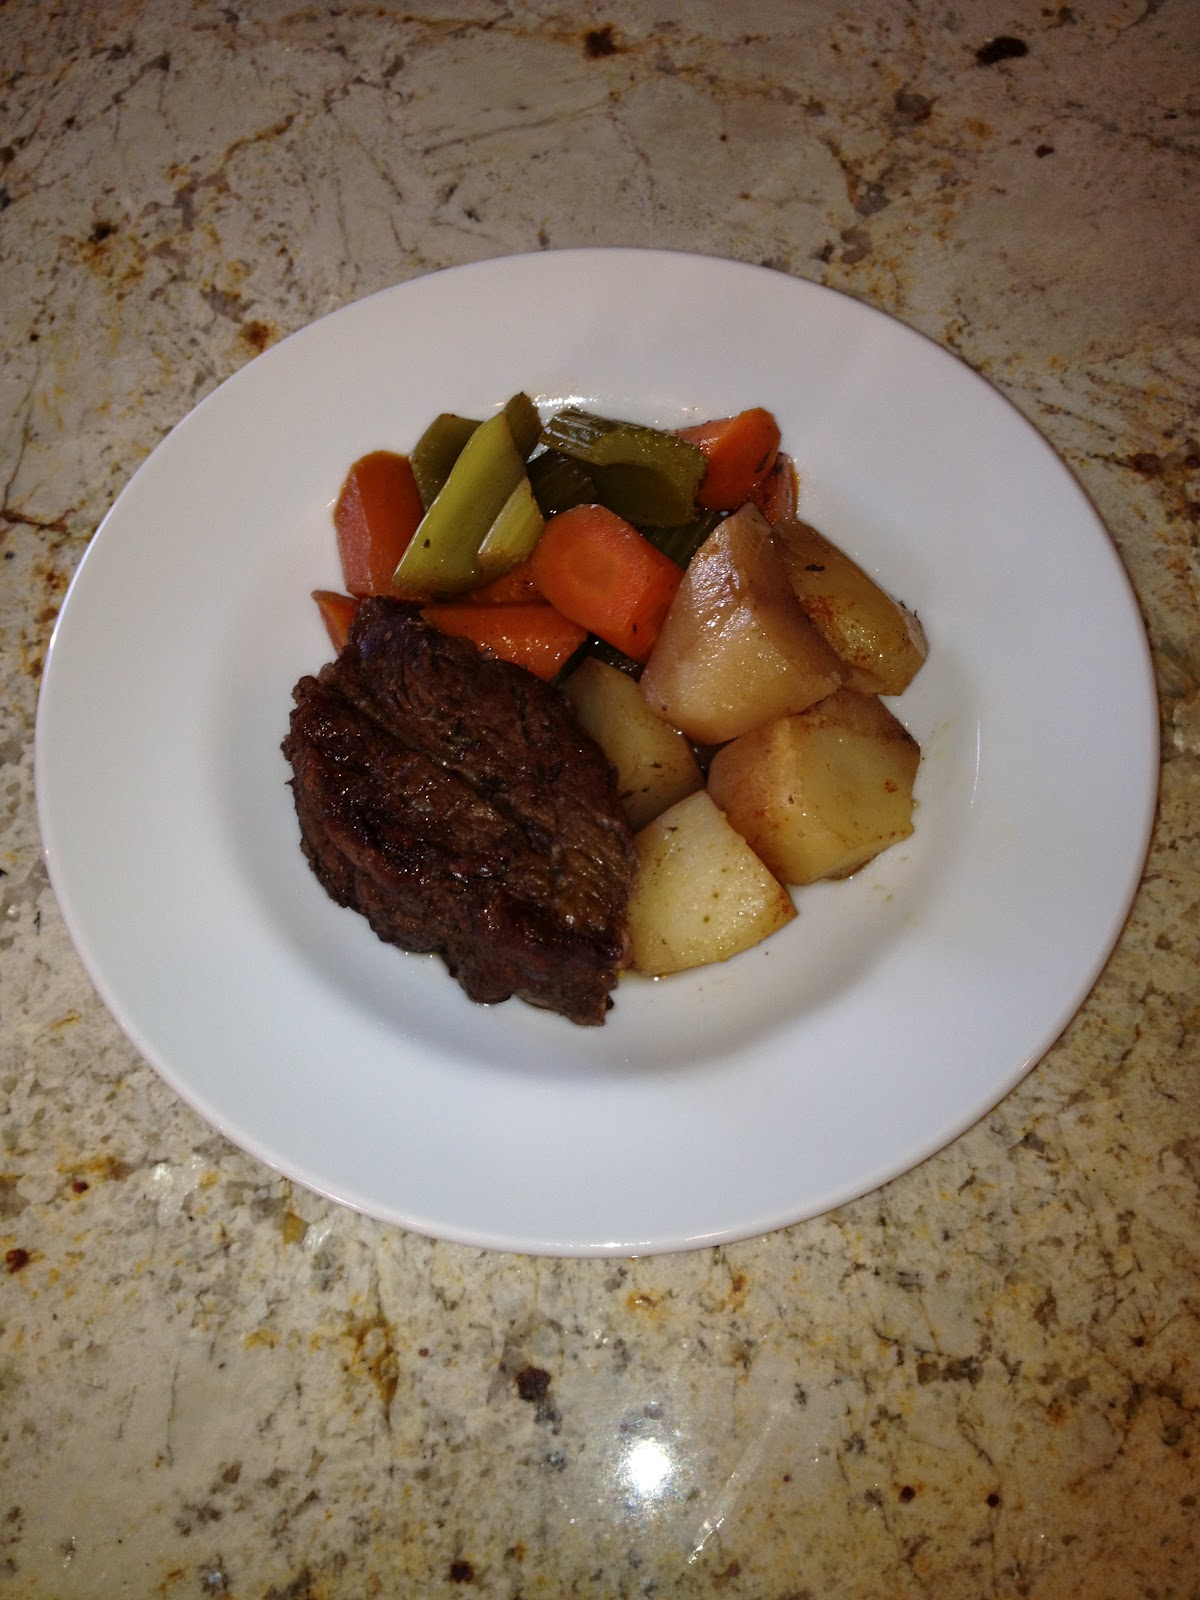
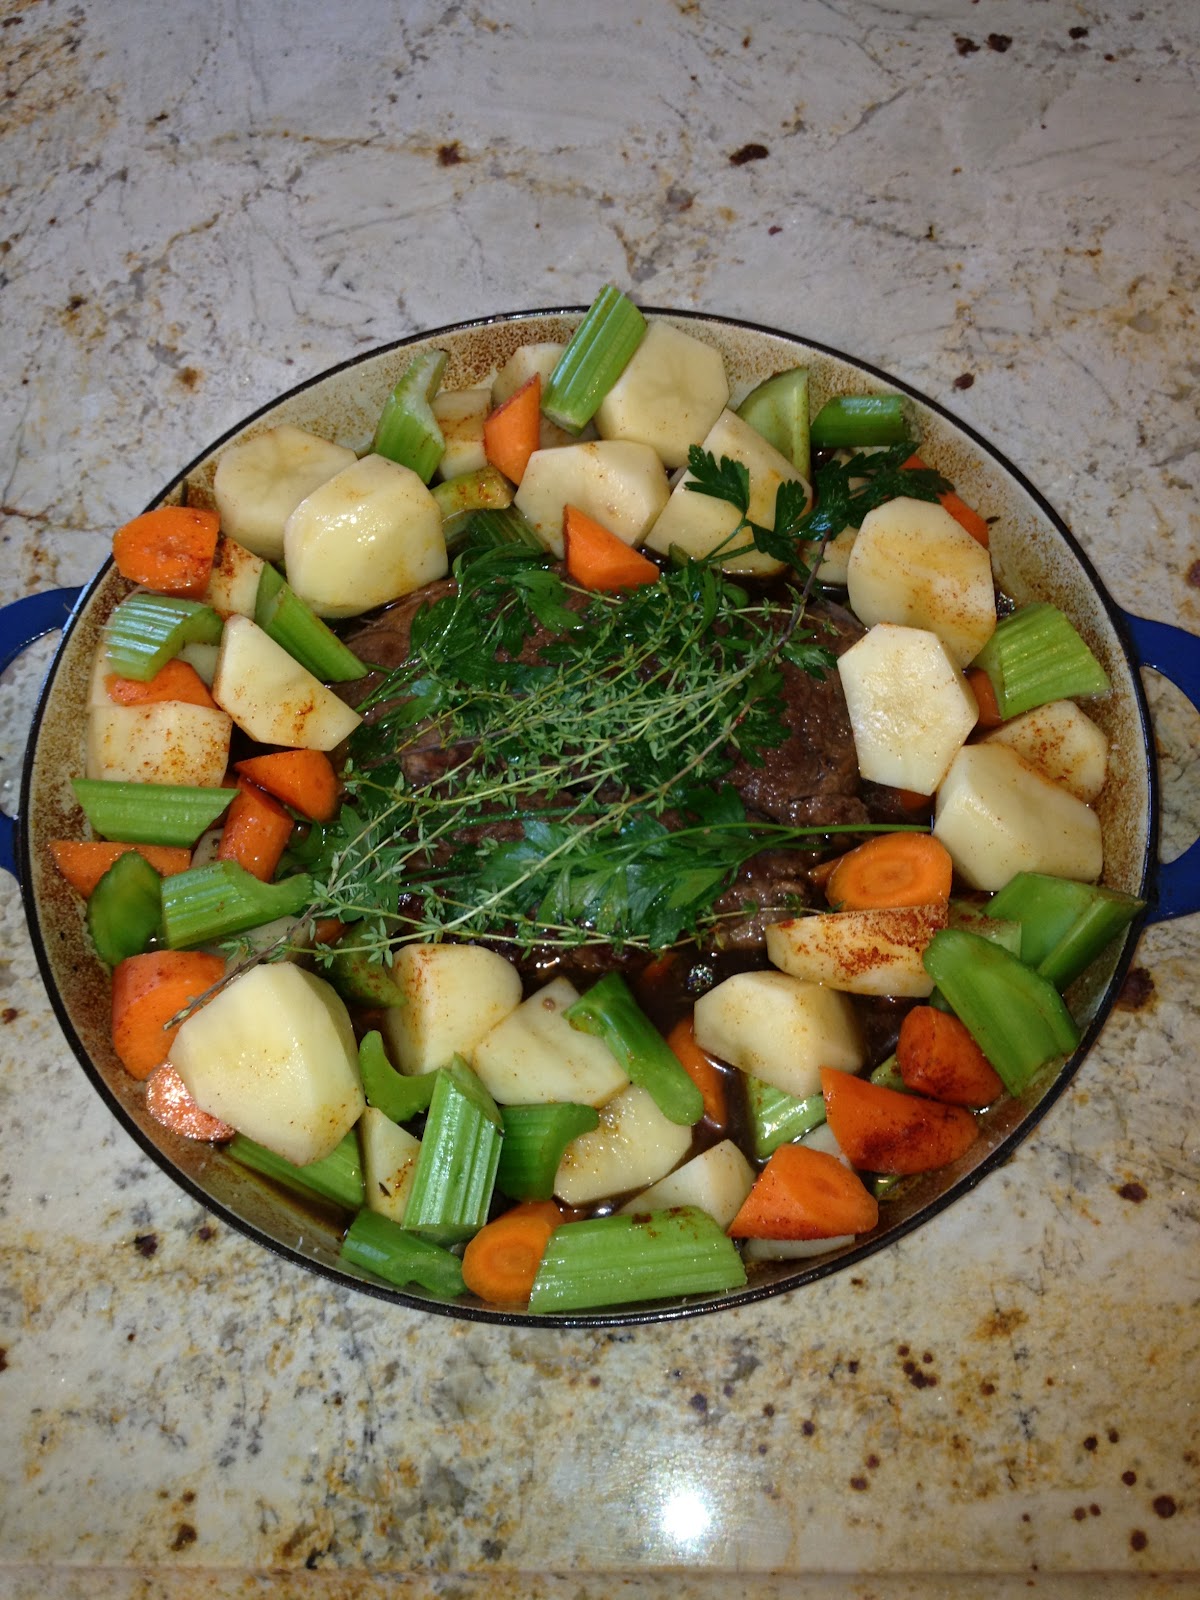
After a few hours, I remove and discard the soggy, limp pieces of carrot, celery, onion, herbs and garlic that have flavored my meat and are unwelcome on my plate. I then replace them with fresh pieces of carrot, celery and potatoes. Another 30-40 minutes in the oven and I have a pot filled with tender, flavorful meat surrounded by firm, bright and delicious vegetables to serve.

Ingredients
§     One 3 to 4 pound boneless chuck roast
§     2 or 4 tablespoons vegetable oil
§     1 whole onions, peeled and quartered
§     4 to 5 garlic cloves, peeled
§     4 large potatoes, peeled
§     7 - 8 carrots, peeled
§     7 - 8 stalks of celery
§     1 cup red wine (optional)
§     1 cup beef broth
§     3 tablespoons Worcestershire Sauce
§     6 or 8 sprigs fresh thyme
§     1/2 cup parsley sprigs
§     Salt and freshly ground black pepper


Directions
Preheat oven to 350 degrees. Generously season meat on all sides with salt and pepper. Heat a thin coat of vegetable oil in a heavy bottomed skillet or Dutch oven and add seasoned meat. Over a medium high heat, sear roast on all sides, about 10 minutes.


Reduce to medium heat. With the meat in the center, add the onion, whole garlic cloves, carrots and celery.


Since I am going to discard these vegetables, I typically select the thinner, less desirable carrots and celery stalks. If all of the carrots are thin, use the thinner half to flavor the dish and the thicker ends to eat.  Add stock, red wine, (if you are not using wine, double the amount of beef broth), Worcestershire Sauce, half of the thyme and parsley. Bring to boil, cover, place in oven and roast for 2 1/2 hours or until meat is tender.


When the beef is fork tender, remove from oven and discard all of the vegetables, herbs and aromatics.


Replace them with the remaining carrots, celery and potatoes.


All of the vegetables should be similar in size. Add the remaining thyme and parsley springs and season the vegetables with salt and pepper. There should be at least 1/2 inch of juice at the bottom of the pan. If not, add a little water.


Place in oven and continue to cook for another 30 – 40 minutes or until the vegetables are tender and the potatoes cooked through. The cooking time will vary depending on the size of the vegetables.


For a printer friendly copy of this recipe, go to Pot Roast.  Enjoy!