Sunday, March 25, 2012

Hot Pepper Jelly

I never heard of Hot Pepper Jelly until I moved to the south 20 years ago.  I remember attending a cocktail party and seeing a block of cream cheese with a red speckled sauce sitting alongside a bowl of crackers.  I had no idea what it was, but I am willing to try anything….especially when cream cheese is part of the dish. 

I fell in love at first bite with this delicious, sweet and spicy southern staple.  I tried to recreate that moment with purchased jars of jelly, but never did until I perfected this simple recipe. 

If you feel the need to make dozens of jars and store them in your pantry, you can boil the jars and begin the canning process, but this jelly is so quick and simple to make, unless I'm making a huge amount to distribute as gifts from my kitchen, I make it in small batches and keep it in the refrigerator.


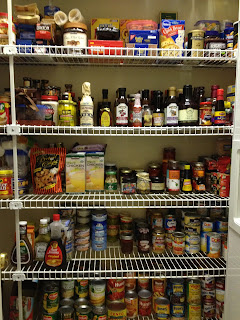
I must admit, when I got into the kitchen today I had no idea what I was going to make.  Most people will choose a recipe and go to the market for ingredients.  I keep a pretty well stocked pantry, so when I feel like relaxing on a Saturday afternoon…which to me means puttering around in my kitchen….I inventory my pantry and refrigerator for inspiration.


Today I found my inspiration from a bag with just a small handful of mini red and yellow peppers that hadn’t made it into one of this week's salads.


Ingredients:
·         ¾ cups chopped red (and/or yellow) bell peppers
·         ¼ cup chopped fresh hot jalapeno or red pepper
·         1 ½ cups apple cider vinegar
·         6 cups sugar
·         4 ounces pectin (Certo recommended)
·         4 drops of red food coloring (optional)

Directions:
I've developed fairly good knife skills and like to see the tiny square pieces in my finished jelly, so I chop the peppers, but feel free to use a food processor. 

The last time I made this jelly, my friend Michael complained that it wasn't hot enough.  Since I'm taking one of these jars to Michael's house for our friendly, monthly poker game this week, I wanted to make sure I included each and every jalapeno pepper seed.  If you are not a fan of heat, leave out a few seeds.

In a saucepan, combine the pepper mixture, vinegar and sugar.


Bring to a rolling boil (a boil that doesn’t stop bubbling when stirred) on high heat, stirring constantly.  Remove from heat and add pectin. 


At this point, the pepper jelly is complete and delicious, but I like the vibrant color I get from adding just 4 drops of red food coloring (optional).


Although my favorite way to eat Hot Pepper Jelly is still with cream cheese on a cracker, you can find many recipes where it's included as an ingredient.  Today I'm using it as a dipping sauce for poppers.

For a printer friendly copy of this recipe, go to Hot Pepper Jelly.  Enjoy!

Sunday, March 4, 2012

Bacon Candy

I've wanted to write this Blog for quite a while, but always found reasons to put it off…mostly because as you’ll soon recognize, I am not a writer.  Today I realized that it’s not the writing that will bring you back each month but the recipes I’m asked to share each time I make one of my experiments for friends or family.

After the party to celebrate Meredith's birthday last night and the number of requests I got for recipes for both of the dishes I brought, I realized....IT'S TIME. Welcome to my Blog, appropriately named "My Most Requested Recipes." If I never created another recipe, I have enough in my repertoire to keep this monthly Blog active for years.

If I asked any of my friends or colleagues for a suggestion as to which recipe should be my first, I can guarantee that 99 out of 100 will name the “Bacon Candy.”  No matter where I bring these tasty treats, most of my evening is spent giving out the recipe and describing how it’s made.


The trick to these delicious bites is to begin with THICK BACON.  Although any thick bacon will work, I prefer to use the bacon packaged like this.


Ingredients:
  • Thick Bacon
  • Light Brown Sugar
  • Yellow Corn Meal
Directions:
I don't like to spend a lot of time cleaning up, so I line my baking pan with heavy aluminum foil and spray the baking rack with non stick cooking spray.


Preheat oven to 350 degrees.  In a mixing bowl, combine the brown sugar and corn meal (1 cup of brown sugar to 1 T corn meal).  For this entire package of bacon, I will use approximately 3 cups of brown sugar and 3 T of corn meal.


Before separating the bacon, cut the slices into thirds.  One third of a slice creates a nice, 2 bite piece.  Dip each piece of bacon into the brown sugar/corn meal mixture to coat heavily and place onto the baking rack. If you run out of the brown sugar mixture before finishing, just make a little more.


The bacon will shrink a bit, so don't worry about placing the bacon too close together.  Bake until the bacon is red/brown, approximately 15 - 20 minutes depending on how thick your bacon is.  I like it a little charred around the corners.  Remove to cooling rack.  The bacon will not crisp until it cools.  Serve at room temperature.


If you reuse the baking pan, there is no reason to wash the wire baking rack but be sure to replace the aluminum foil. 

Well, there you have it....my very first Blog and my most requested recipe.  Please let me know what you think.  I welcome your thoughts on suggestions for how to make this better.

For a printer friendly copy of this recipe, go to Bacon Candy.  Enjoy!