Sunday, January 3, 2016

Stuffed Sausage Balls

When I moved to Nashville 25 years ago, I was introduced to many Southern specialties.  Sausage balls was one of the southern offerings I had never seen before.  I’m told these tasty appetizers have been around for decades, yet they never go out of style on any respectable southern party table.
  
Some may say they are old fashioned, but if you ever go to a party where these are served, they are often the first to go.  The sausage ball has evolved some over the years, but the basic recipe is almost always the same....Sausage, Bisquick and  Cheese. 

This particular recipe adds cream cheese to the mix to amp up the creaminess and flavor of the original Bisquick sausage ball recipe.  Last week I met my dear friend, Pat for breakfast.  When I told her I was going home to prepare sausage balls for my Christmas Eve family gathering, she shared with me her mother's twist on this classic.  Her mom would stuff the sausage balls with a surprise green olive in the center.  Whether you stuff them with an olive or serve them plain, these sausage balls are guaranteed to disappear quickly.

Ingredients:

§  1 lb of uncooked sausage
§  1 8oz block of cream cheese, room temperature
§  2 cups of Bisquick baking mix
§  1 1/2 cups shredded sharp cheddar cheese

Optional:
§  small green olives

Directions:

Preheat oven to 350 degrees.  Line a baking sheet with parchment paper or Silpat. 
In a bowl, mix together sausage and softened cream cheese.  You can use an electric mixer, but I prefer to use my hands.
 
Add Bisquick and cheese and stir until combined. 
For consistently sized sausage balls, I use a small ice cream scoop.  Scoop the meat mixture and form into small balls.  If you are going to stuff the sausage balls with an olive, create a small well in the center of the ball and bring the meat up to cover the olive.  Everyone loves sausage balls, but not everyone likes olives, so I make half stuffed sausage balls and half not.
Roll in the palms of your hands for a smooth finish.  Refrigerate for a minimum of 30 minutes to firm the balls so they keep their shape when baked.  The sausage balls can be prepared and refrigerated day in advance.  Keep in the refrigerator or freezer until ready to bake.
 
Bake until golden brown and firm to the touch, approximately 20 – 25 minutes depending on the size.  If baking frozen, be prepared to add a few minutes to the baking time.
  
For a printer friendly copy of this recipe, go to Stuffed Sausage Balls. Enjoy!

Sunday, December 6, 2015

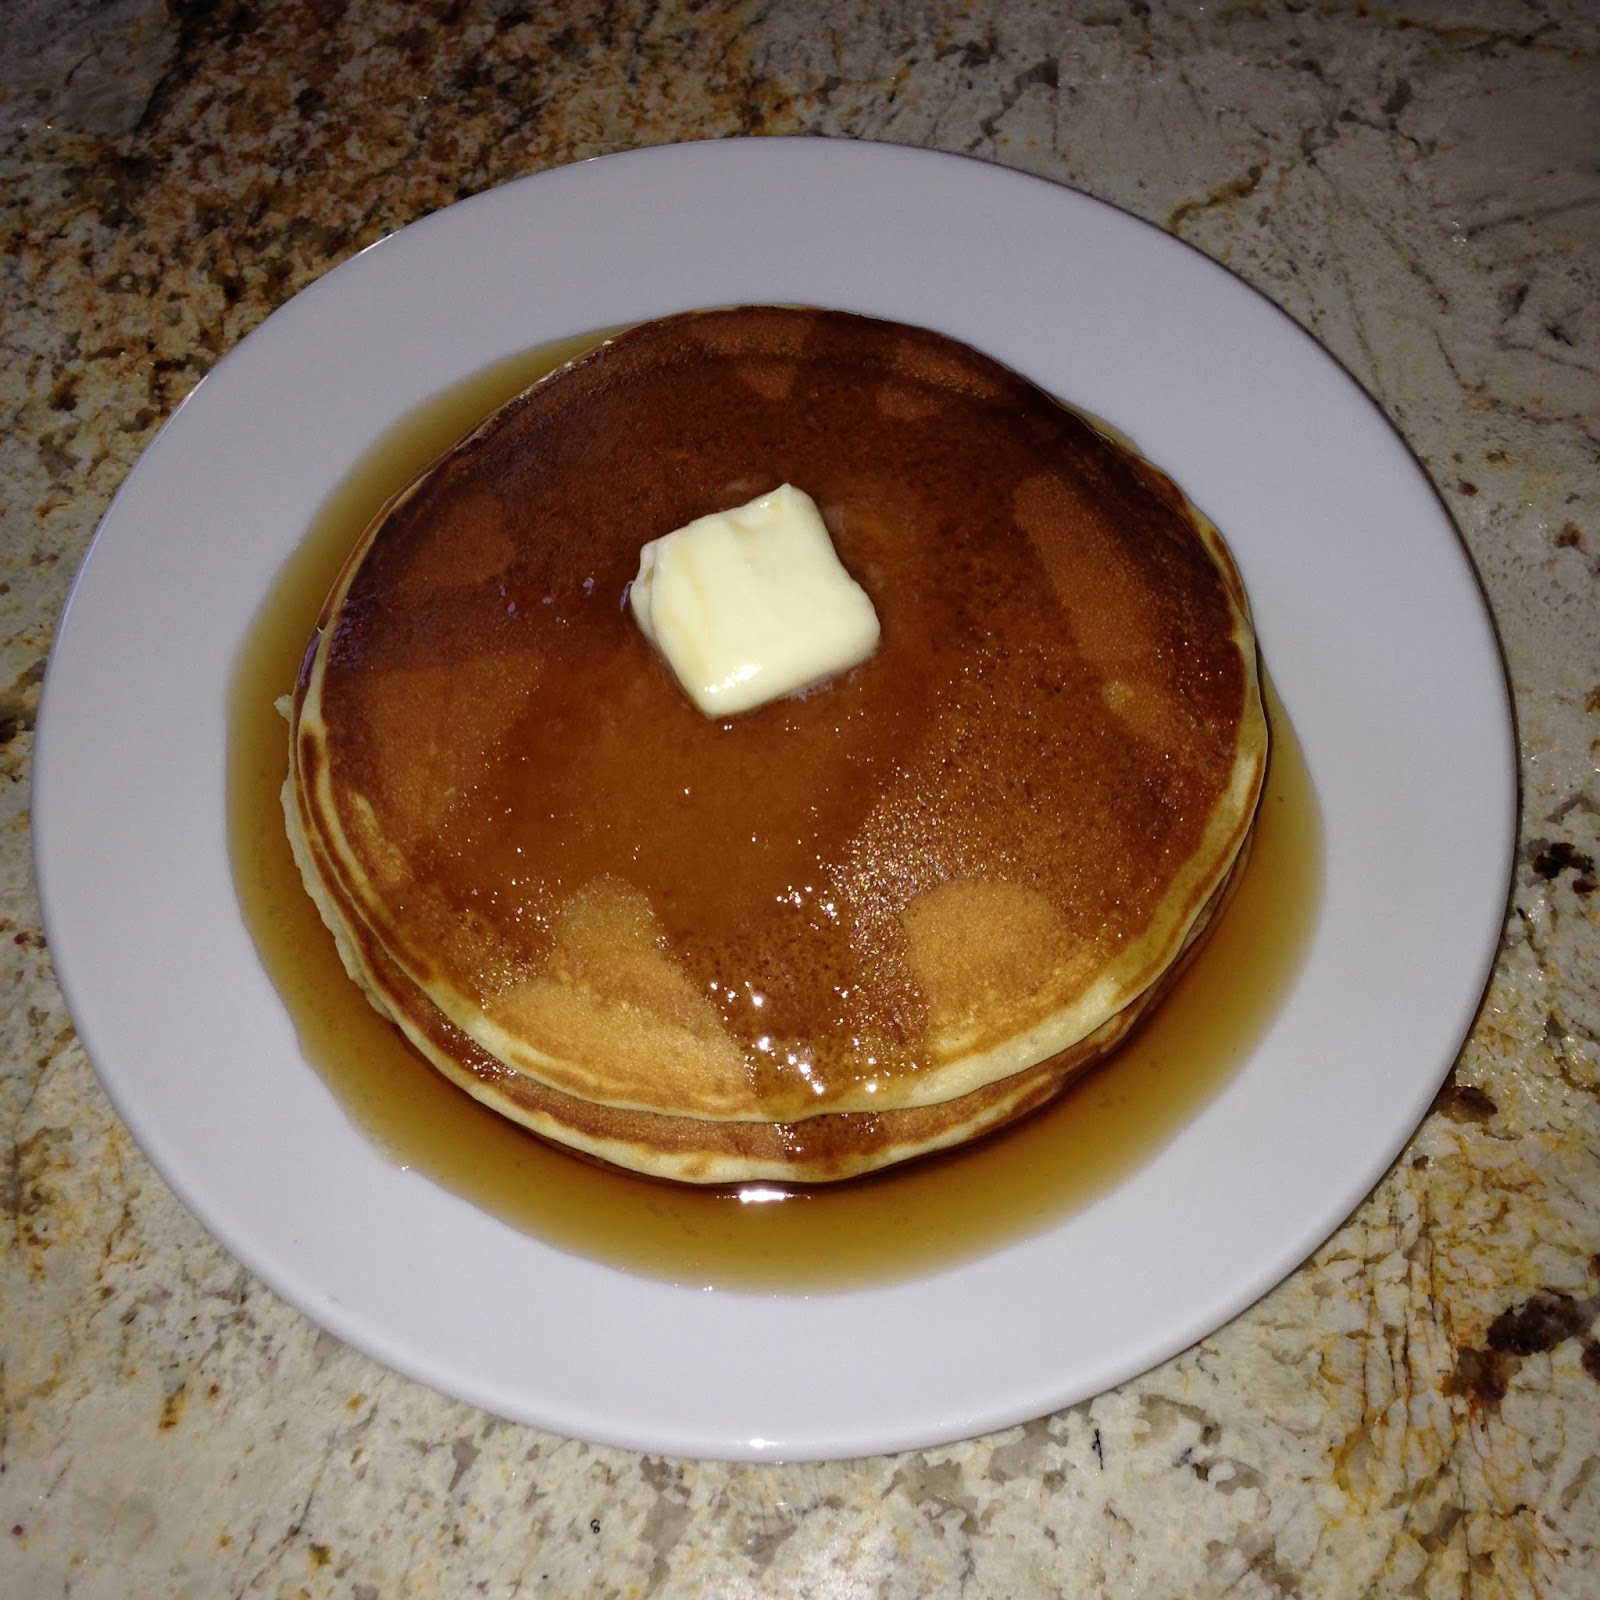
Light and Fluffy Buttermilk Pancakes (No Buttermilk...No Problem)

I recently attended an industry trade show in Las Vegas where I connected with old friends and made new ones.  Although I’ve been in the Hospitality Industry for over 30 years, when I see old friends, it’s most often my blog they want to talk about.  On the second day of the show, I found myself in a debate with an old friend, Ola from Russkie Prostori in St. Petersburg, Russia, about pancakes.  He prefers the thin, silky and slightly dense European pancake.   

Although I agree with Ola that European pancakes are delicious, sometimes a girl just needs the light and fluffy American version.  The secret to light and fluffy is the buttermilk, but I rarely keep it in the house.  If you don’t have buttermilk, I will show you a quick and easy way to make a buttermilk mixture from two ingredients you probably always have in the kitchen that will work in any recipe.  No matter how you like to top your pancakes, this most requested recipe makes for the perfect canvas.

Ingredients:
§  3/4 cup milk
§  1 tablespoon white vinegar
§  1 cup all-purpose flour
§  2 tablespoons sugar
§  1 teaspoon baking powder
§  1/2 teaspoon baking soda
§  1/2 teaspoon salt
§  1 egg
§  2 tablespoons melted butter
§  cooking spray

For Serving:
§  Sweet butter
§  Maple Syrup

Directions:
To make a buttermilk mixture, in a small bowl, combine milk with vinegar and set aside for 5 – 10 minutes. 


The milk will become thick, resembling buttermilk.
 

In a medium sized bowl, combine the dry ingredients…flour, sugar, baking powder, baking soda and salt. 


In a large bowl, whisk together the wet ingredients…egg, melted butter and milk mixture.
 

Keep the two mixtures separate until ready to cook.  Heat a lightly oiled griddle or skillet over medium/high heat, or use cooking spray.
 

Pour the wet mixture into the dry mixture and whisk until just combined.  For light and fluffy pancakes, do not overbeat.
 

Pour or scoop the batter onto the griddle, using approximately 1/4 to 1/2 cups for each pancake, depending on the size you prefer. 


Cook until bubbles appear on the surface.  Flip with a spatula and cook until browned on the other side. 


Serve warm with butter and maple syrup.  For a printer friendly copy of this recipe, go to Light and Fluffy Buttermilk Pancakes. Enjoy!

Sunday, November 1, 2015

Corn Muffins

With Thanksgiving approaching I wanted to post a recipe to compliment your holiday menu.  As I reviewed my previous holiday selections, I noticed that I have never given you the recipe for my celebrated Corn Muffins, the perfect substitute or compliment for the dinner roll or biscuit staple at most tables. 
Although these corn muffins are lightly sweetened, even the diehard southerners who would never eat cornbread with sugar find themselves coming back for another.
For those of you who are new to my blog, there are several recipes I previously posted you may want to add to your Thanksgiving Menu.  If you typically serve soup at the beginning of the meal, try the “Pumpkin Soup“ or “Autumn Squash Soup.“  Instead of mashed potatoes or candied yams, try Mashed Sweet Potatoes or better yet Praline Sweet Potatoes which can be made a day in advance.  Actually, the Praline Sweet Potatoes taste even better as part of your Black Friday leftover lineup.  Corn is always on our Thanksgiving table and Corn Soufflé is the most requested.  Finally, Pumpkin Mousse is a light addition that fits well into my dessert table staples of pecan and fruit pies.

Ingredients:
§     3 cups flour
§     1 cup sugar
§     1 cup medium cornmeal
§     2 tablespoons baking powder
§     1 1/2 teaspoons salt
§     1 1/2 cups whole milk
§     2 sticks of unsalted butter, melted
§     2 large eggs

Directions:
Preheat oven to 350 degrees. 
 
In a large bowl, mix the flour, sugar, cornmeal, baking powder and salt.
In a separate bowl, beat together the milk, melted butter and eggs.
 
Pour the wet ingredients into the dry ingredients.  With a wooden spoon, stir until the batter is just blended.   Do not overbeat.  The batter will look a little lumpy and may even have spots of flour.
Spray the muffin tin with non-stick spray.  I am using a mini muffin tin but this batter can be baked in a large muffin tin or flat pan.  To keep the muffins the same size, I use an ice cream scoop to spoon the batter into the muffin tin.
 
Bake until brown and crispy on top and a toothpick comes out clean.
 
The mini muffins took only 10 – 12 minutes.  Larger muffins will take about 30 minutes. 
Cool slightly and remove from the pan.


For a printer friendly copy of this recipe, go to Corn Muffins. Enjoy!

Sunday, October 4, 2015

Chocolate Boston Cream Cake

Please keep the emails coming. Not only do I get many click-throughs to access my recipes, but I feel honored to have so many of you email me to let me know how the recipe turned out. Since the Chocolate Whipped Cream Cake I posted several months ago got such an overwhelming response, I thought you might like another of my favorite easy, go-to cakes. 
 

I typically make this cake using a Yellow Cake Mix, which I personally prefer; but since I have so many chocolate lovers in my family, this version is one of the most requested.  I sometimes make the filling, without cake, as a substitute for a Vanilla Mousse. Whether you make it using Yellow Cake Mix or Chocolate Cake Mix, this cake is guaranteed to become one of your most requested too.

Ingredients:
§     1 box Devil’s Food or Yellow Cake Mix
§     4 eggs
§     1/3 cup vegetable oil
§     1/2 cup coffee (if using Devil’s Food Cake Mix
§      ½ cup whole milk
§     1 tablespoon pure vanilla
§     1/2 teaspoon salt
§     1 cup heavy cream, cold
§     1/2 cup half and half
§     3 ounces package instant vanilla pudding mix
§     1/2 cup prepared chocolate icing, softened in microwave

Directions:

Preheat oven to 350 degrees.  Prepare two 9 inch round or square baking pan by spraying with non-stick cooking spray.  In a large bowl, mix together eggs, coffee, milk, oil, vanilla and salt.  Add the cake mix and beat at medium speed for 2 minutes.  Pour the batter into the prepared pan and bake for approximately 25 minutes or until a toothpick inserted in the center comes out clean.
  
Remove from oven and cool.
Once the cake is completely cooled it is ready to frost.
On low speed, beat the heavy cream and half and half with the instant vanilla pudding mix until it is very thick.
 
Make sure the cake layer is very cold and spread the cream mixture over one of the cake layers.
 
Place the remaining cake layer on top of the cream.
 
In a microwave safe cup, soften 1/2 cup chocolate icing in the microwave and pour over the top cake layer.
For a printer friendly copy of this recipe, go to Chocolate Boston Cream Cake. Enjoy!

Sunday, September 6, 2015

Mushroom Lasagna

When I told my niece, Jackie, that I was invited to have dinner with friends at a local, trendy restaurant, she suggested I order the Blueberry Lasagna.  Although it sounded more like a dessert than a meal, she revealed that I would be in for a pleasant surprise.  When the lasagna arrived to the table, it was actually a mushroom lasagna with béchamel sauce, similar to one I have been making for years, that sat on a small puddle of blueberry sauce.  I must admit this was a nice addition and I wish I would have thought of it myself.  Whether you scape the plate with Blueberry Sauce or not, this Wild Mushroom Lasagna is worth taking the time to make.
 
My friend Michael believes I need to write a cookbook called “Straight From the Freezer,” because I have learned a way to successfully freeze almost everything.  When I say “successfully freeze,” it means that I can freeze, defrost and serve meals from my freezer that you would swear were freshly cooked.  This lasagna is another one of those dishes that I prepare in small casserole dishes and keep in the freezer for last minute meals.

Béchamel Ingredients:
§     1 stick butter
§     1/2 cup flour
§     4 cups milk
§     1 tablespoon Dijon mustard
§     1/4 cup dry sherry
§     1/2 teaspoon freshly grated nutmeg
§     Kosher Salt

Mushroom Lasagna Ingredients:
§     1 Box no-cook lasagna noodles
§     2 pounds of assorted mushrooms
§     3  tablespoons olive oil
§     3  tablespoons unsalted butter
§     1 cup parmesan cheese
§     Fresh Thyme

Directions:

Preheat the oven to 350 degrees.
To make the Béchamel, begin with a roux. In a large pot, melt the butter. When butter is melted, add the flour and whisk together over medium-low heat for a minute or two just to get the raw taste out of the flour.  For this light colored dish, we do not want to brown the roux.
While whisking, add the milk and continue to cook until thick and smooth. To speed up the process, I sometimes pour the milk into a heat resistant cup and warm in the microwave before adding it to the roux.  Once the white sauce is thick and smooth, lower the heat and add the Dijon mustard, 1/2 teaspoon of freshly grated nutmeg and my secret ingredient, dry sherry. Sherry is another one of those fortified wines I buy in the local liquor store which is very inexpensive and will last in the pantry.  Remove the béchamel from the heat and set to the side.
Chop the mushrooms in the food processor.
Melt 3 tablespoons of butter and 3 tablespoons of olive oil in a large sauté pan. Add the chopped mushrooms, sprinkle with salt, and cook over medium heat for about 5 minutes, until the mushrooms release their juices. Set the mushrooms aside. 
To assemble the lasagna, spread some of the béchamel sauce in the bottom of a casserole dish.


Arrange a layer of noodles on top, then more sauce, then 1/3 of the mushrooms, 1/4 cup grated Parmesan and sprinkle with fresh Thyme. Repeat 2 more times, layering noodles, sauce, mushrooms and Parmesan.
Top with a final layer of noodles and sauce, and sprinkle with the remaining Parmesan.
Bake the lasagna for 45 minutes, or until the top is browned the sauce is bubbly and hot.
Allow to sit at room temperature for 15 minutes and serve hot. For a printer friendly copy of this recipe, go to Mushroom Lasagna. Enjoy!